Introduction to Cheesy Taco Sticks Baking
Why Cheesy Taco Sticks are the Perfect Snack for Young Professionals
As a young professional, your days are jam-packed with back-to-back meetings, deadlines, and an occasional caffeine boost to keep you going. Sometimes, you just need a quick snack that feels indulgent but doesn’t require hours in the kitchen. Enter cheesy taco sticks baking! These delicious bites pack all the flavors of your favorite tacos into an easy-to-make treat perfect for busy weeknights or impromptu gatherings with friends.
Imagine coming home after a long day, and within just 30 minutes, you have fresh, piping-hot cheesy taco sticks ready to munch on. Not only are they a fantastic snack, but they’re also made from wholesome ingredients that you can customize to your liking. Whether you fancy chicken ham, turkey bacon, or even a vegetarian version, this recipe opens the door to culinary creativity.
The Allure of Homemade Food vs. Fast Food
While fast food might be quick and convenient, it often lacks the personal touch and quality that homemade food provides. According to a study by the Harvard School of Public Health, individuals who prepare meals at home regularly consume fewer calories and healthier ingredients compared to those who rely on takeout. By opting for cheesy taco sticks baking, you can enjoy restaurant-quality flavors right in your kitchen, all while knowing exactly what goes into your food.
Plus, making your snacks at home can often be more affordable than frequently hitting up your favorite fast-food joint. With just a few simple ingredients—tortillas, cheese, and your choice of protein—you’re well on your way to creating a scrumptious treat that doesn’t break the bank.
Crafting these cheesy delights offers a phenomenal opportunity for a little mid-week meal prep, too. You could double the batch, freeze some for later, and always have a crowd-pleaser on hand. So next time you’re tempted to grab that takeout, ask yourself: Why not whip up some cheesy taco sticks instead? Your taste buds—and wallet—will thank you!
For more details on the health benefits of cooking at home, check out HealthLine for some inspiring stats.
Ingredients for Cheesy Taco Sticks
Main Ingredients Needed
When you embark on cheesy taco sticks baking, having the right components is key to securing that delicious, melty goodness. Here’s what you’ll need:
- Tortillas: Flour or corn, depending on your texture preference.
- Cheese: A blend of shredded cheddar and mozzarella works wonders for a gooey center.
- Ground Beef: Seasoned to perfection to elevate the taco flavor profile.
- Turkey Bacon: A tasty twist that adds a savory kick.
- Chicken Ham: Adds a delightful, meaty texture and rich flavor.
These main ingredients create a solid foundation for your cheesy taco sticks. Who can resist the allure of cheesy, crispy deliciousness?
Optional Ingredients for Extra Flavor
Take your cheesy taco sticks to the next level with these bonus items:
- Sour Cream: For a zesty dip on the side.
- Chopped Jalapeños: If you’re feeling spicy!
- Green Onions: A fresh touch that brightens up every bite.
- Mexican Spices: Think taco seasoning or cumin to enhance the flavor.
Feel free to experiment and make this recipe truly yours! Don’t forget to check out Food Network or Serious Eats for more incredible flavor combinations. Happy baking!
Step-by-Step Preparation of Cheesy Taco Sticks
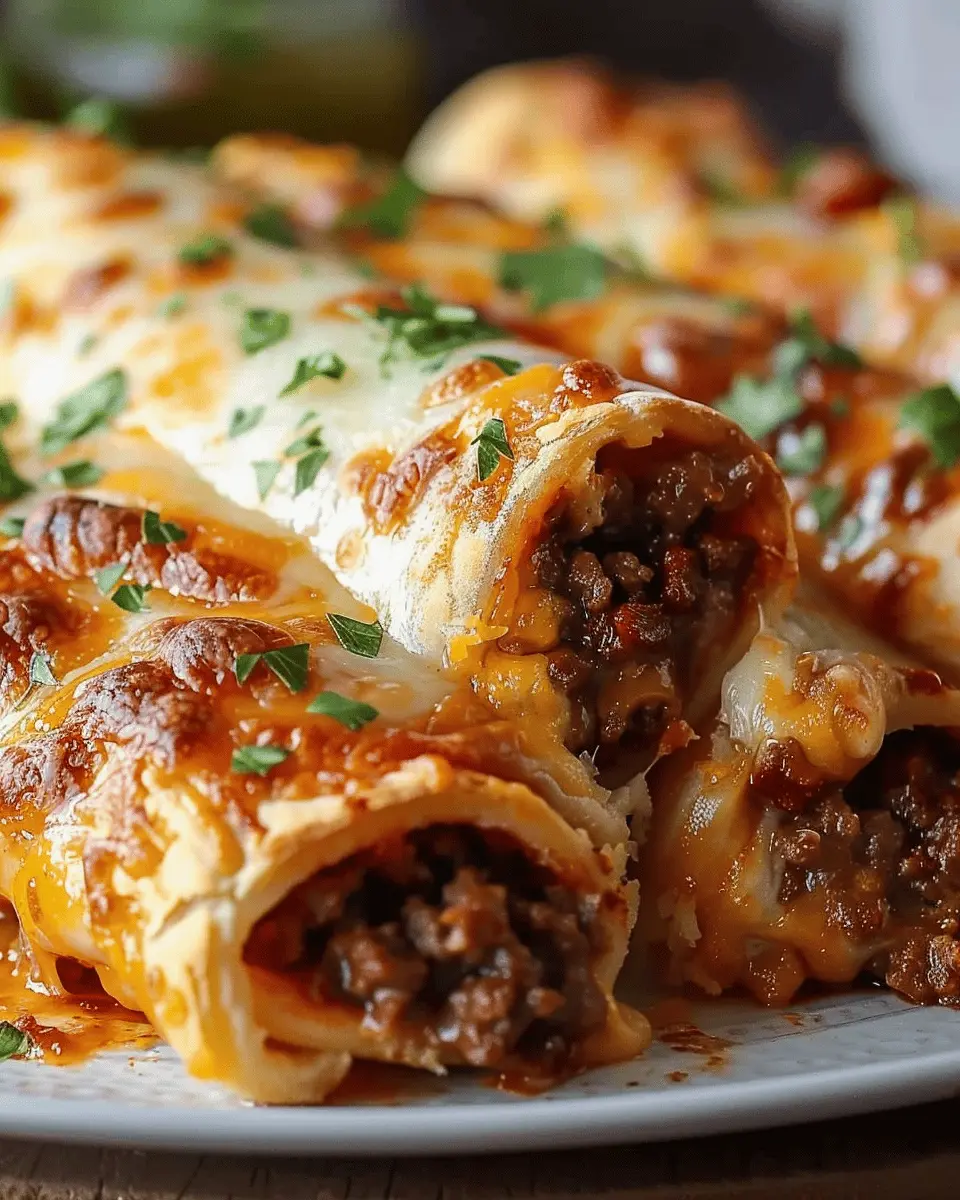
When it comes to innovative snacks, cheesy taco sticks baking offers a delightful fusion of flavors that your taste buds will thank you for. With crispy outsides and melty, cheesy insides, these cheesy taco sticks are perfect for a game day, movie night, or casual gathering. Let’s dive right into the steps that’ll transform your kitchen into the ultimate taco stick factory!
Prepare Your Workspace
Before diving into ingredients, it’s essential to prep your workspace. Clean your countertops and gather your tools:
- Baking sheet
- Parchment paper
- Rolling pin
- Mixing bowls
- Knife and cutting board
Having everything within reach will make the process smoother and more enjoyable. It’s a little trick I always use to keep the chaos at bay—trust me, you’ll appreciate it when you’re knee-deep in dough!
Cook the Ground Beef to Perfection
In a large skillet over medium heat, add your favorite ground beef. For a twist, consider using lean beef to keep it lighter or opt for a blend of spices to amp up the flavor.
- Ingredients for beef filling:
- 1 pound ground beef
- 1 packet taco seasoning (or your homemade mix)
- ½ cup water
- Optional: dice some fresh onions or peppers for added crunch
Sauté until browned and fully cooked, which usually takes about 7-10 minutes. Make sure to drain any excess fat and then add taco seasoning and water. Stir it all together until thickened—this will create the perfect flavor-packed filling. Never underestimate the magic of well-seasoned beef in the world of cheesy taco sticks baking!
Roll Out and Divide the Pizza Dough
While your beef is cooking, preheat your oven to 375°F (190°C). Grab your pizza dough (a store-bought option can save time) and roll it out on a floured surface until it’s about ¼ inch thick.
- Divide the dough into rectangles—aiming for around 5 x 3 inches. This size will allow you to stuff them generously without breaking the dough.
This is where you can unleash your creativity! Use a pizza cutter for straight lines, and if you feel adventurous, why not attempt a fun shape?
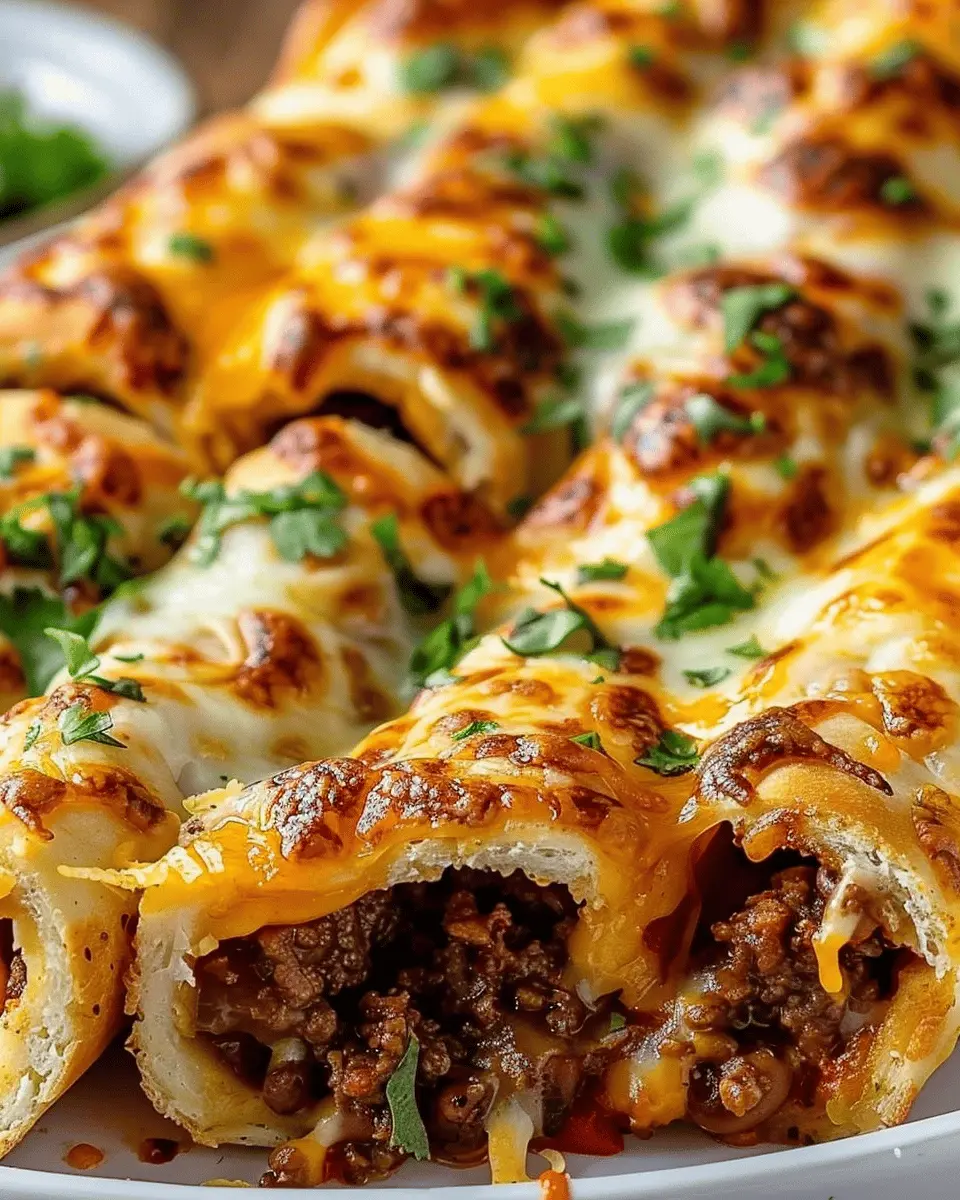
Assemble the Cheesy Taco Sticks
Now the fun really begins! Spread a layer of your cooked ground beef in the center of each dough rectangle, leaving enough space on the edges to enclose the filling later.
- Top with shredded cheese—cheddar, Monterey Jack, or a melty combination work beautifully.
Next, fold the dough over, pressing down the edges to seal. You can pinch, fold, or even use a fork to create a decorative finish. Trust me; presentation matters when serving these cheesy delights!
Brush with Garlic Butter
To enhance the flavor, melt a tablespoon of butter with a clove of minced garlic in a small bowl. Brush this aromatic garlic butter over the tops of your assembled taco sticks. Not only does this step add another layer of flavor, but it’ll also give your sticks that irresistible golden finish when baked.
Bake to a Golden Brown
Place your assembled taco sticks on a parchment-lined baking sheet. Pop them into your preheated oven and let them bake for around 15-20 minutes or until they’ve turned golden brown and the cheese is bubbling. The smell wafting from your kitchen will be enough to make anyone’s mouth water!
Let Them Cool Before Serving
Patience is key! Once they’re out of the oven, allow your cheesy taco sticks to cool on a wire rack for a few minutes. This will help the filling settle a bit and prevent any burns while indulging.
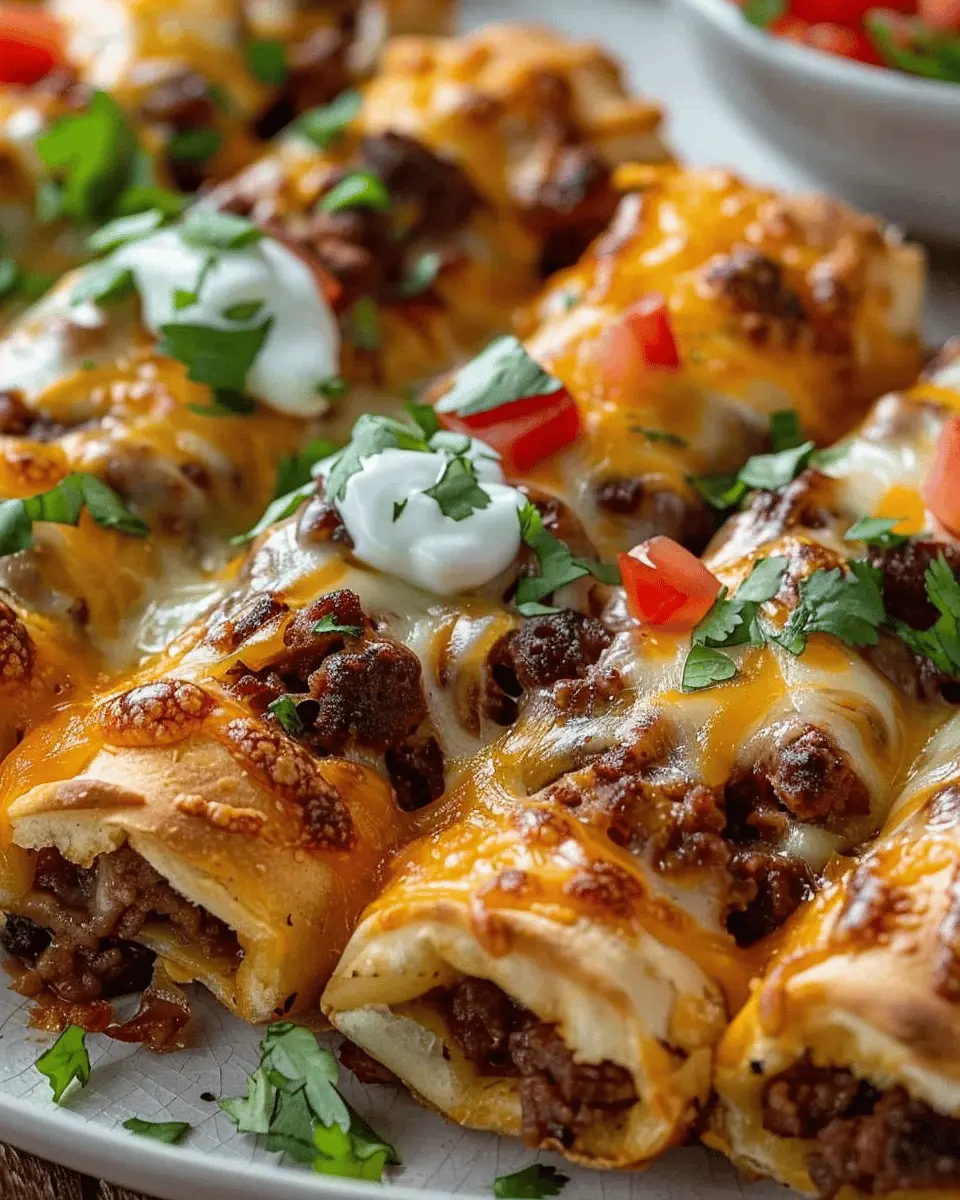
Enjoy dipping them in your favorite salsa, guacamole, or sour cream, and watch them disappear in a flash at your next gathering! Happy cheesy taco sticks baking!
Variations on Cheesy Taco Sticks
If you’re diving into the world of cheesy taco sticks baking, you’ll want to explore some tasty variations to elevate this delicious dish. Here are a few creative twists that cater to different dietary preferences and spice levels!
Vegetarian Option: Replace Ground Beef with Black Beans
If you’re looking for a meat-free alternative, consider using black beans instead of ground beef. Not only do they add a rich, earthy flavor, but they’re also packed with protein and fiber. Simply mash the beans with taco seasoning and spread them in the dough just like you would with meat. For an extra layer of flavor, toss in some corn, diced peppers, or even a handful of shredded cheese.
Spicy Cheesy Taco Sticks: Add Jalapeños or Hot Sauce
For those who crave a kick in their cheesy taco sticks, adding jalapeños or hot sauce is a fantastic way to crank up the heat. You can finely chop fresh jalapeños and mix them into the filling, or you can serve your taco sticks with a side of your favorite hot sauce. If you’re in the mood for something even bolder, try incorporating chipotle sauce for a smoky twist.
Cheddar and Chicken Taco Sticks: A Different Protein Choice
Experimenting with protein can also yield scrumptious results! Opt for shredded chicken instead of beef—especially if you have leftover rotisserie chicken. This option not only adds a juicy texture but is also a lighter alternative if you’re watching your calories. Pair it with sharp cheddar cheese for a classic flavor combo that’s sure to please.
Feel free to try out these variations and make them your own! The beauty of cheesy taco sticks baking is its versatility, so don’t hesitate to experiment with your favorite ingredients. Happy baking!
Cooking Tips and Notes for Cheesy Taco Sticks
Choosing the Right Taco Seasoning
When it comes to cheesy taco sticks baking, the seasoning makes all the difference! Opt for a blend that complements your filling, whether it’s beef or turkey bacon. Store-bought options are convenient, but consider making your own to customize flavors. Combine chili powder, cumin, garlic powder, and a pinch of salt for a homemade mix that will elevate your dish.
Tips for Perfectly Sealing the Dough
To ensure your cheesy taco sticks stay cozy, sealing the dough correctly is crucial. Use a bit of water on your fingers to moisten the edges of the dough before folding. Press down firmly to create a tight seal. An extra suggestion: after sealing, a fork can help crimp the edges and give an appealing finish, too!
How to Avoid Soggy Dough
Nothing ruins a good taco stick like soggy dough. Make sure to drain any excess moisture from your filling—especially if you’re using juicy ingredients like beef or chicken ham. Using pre-cooked and cooled fillings can also help keep everything crunchy. And remember, avoid overstuffing for the perfect balance!
For more insights on this delicious recipe, check out Culinary Nutrition for additional tips!
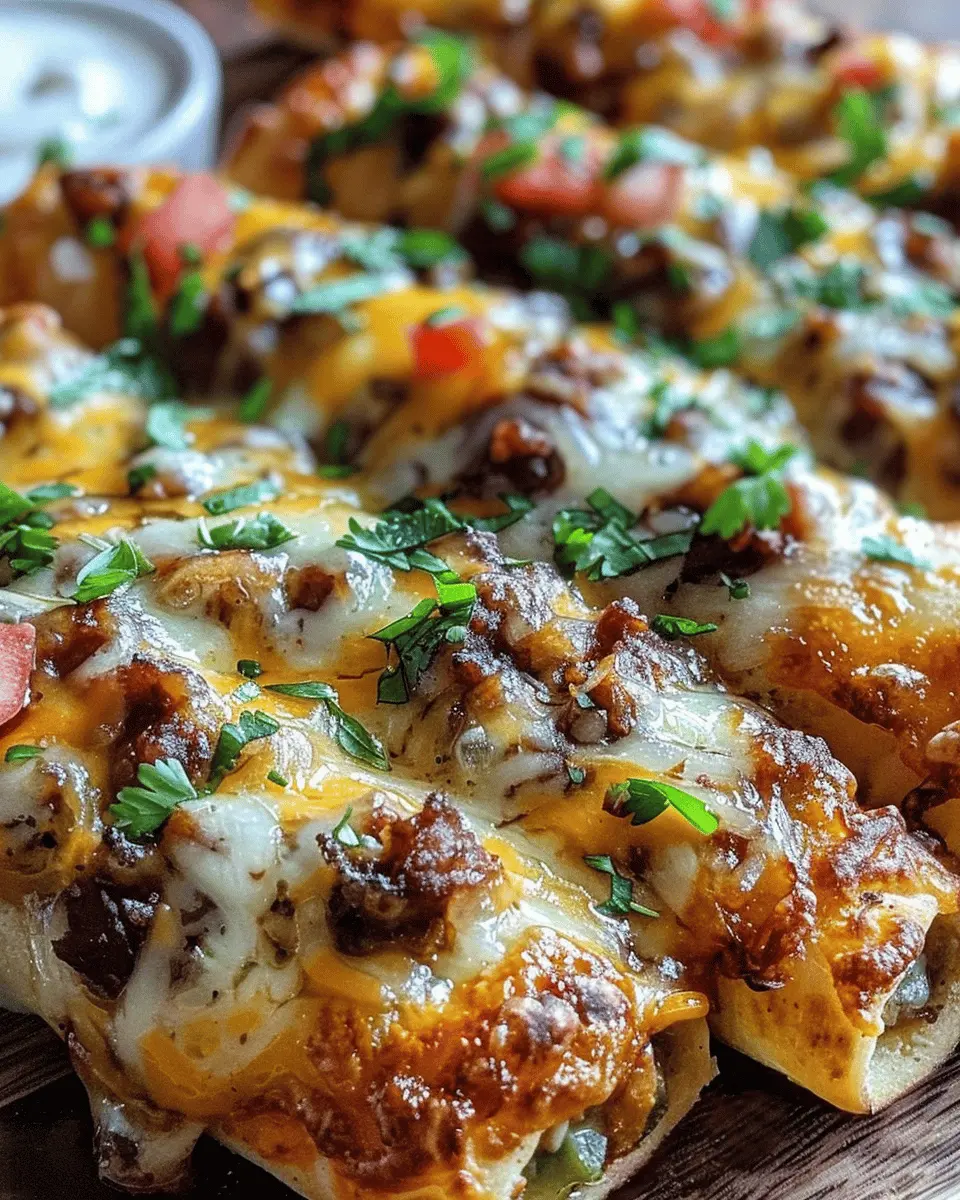
Serving Suggestions for Cheesy Taco Sticks
Best Dipping Sauces to Complement the Flavor
When you think about cheesy taco sticks baking, don’t forget the perfect dips! Here are some sauces that can elevate your cheesy sticks to another level:
- Guacamole: Creamy and rich, guac adds a refreshing twist.
- Sour Cream: A classic choice; its tanginess balances out the cheese and spices beautifully.
- Salsa: Whether it’s mild or spicy, salsa brings a zesty kick that pairs perfectly with cheesy goodness.
- Chipotle Mayo: For those who love a smoky flavor, this dip adds a unique touch.
You can mix and match these dips based on your mood and crowd preferences. There’s something for everyone!
Serving Cheesy Taco Sticks for Parties
Planning a gathering? Cheesy taco sticks are a crowd favorite! They’re easy to make and serve, making them idea for a variety of occasions.
-
Presentation: Arrange them on a platter with colorful dips around the edges. This not only makes for an enticing display but also encourages guests to dive in.
-
Mini Size: Consider making mini versions for appetizers. This way, guests can enjoy them as finger food without filling up too much before the main course.
-
Beverage Pairings: Serve with refreshing beverages like iced tea or flavored sparkling water. They complement the flavors of taco sticks wonderfully.
These easy serving suggestions can help you host a fantastic and flavorful gathering. For more fun taco ideas, check out this post for inspiration!
Time Breakdown for Cheesy Taco Sticks
Preparation Time
Getting ready to whip up your cheesy taco sticks baking adventure is a breeze! Expect to spend about 15-20 minutes gathering ingredients and prepping everything. This includes chopping veggies, mixing your taco fillings, and ensuring you have your dough ready. Don’t rush through this; embracing the prep can make the cooking process much smoother!
Cooking Time
Once your fillings are prepped and ready to go, the cooking part will take a quick 15-20 minutes. Preheat your oven to get that perfect golden brown finish on your taco sticks. While they bake, you can tidy up and get ready to indulge in these tasty treats.
Total Time from Start to Finish
In total, you’ll be looking at around 30-40 minutes from the moment you start prepping to the satisfying moment you pull those cheesy delights from the oven. This makes cheesy taco sticks not only delicious but also a quick option for those busy weeknights or last-minute gatherings.
For more tips and tricks on cooking timing, check out resources from reliable culinary websites like Serious Eats or Bon Appétit!
Nutritional Facts for Cheesy Taco Sticks
When diving into cheesy taco sticks baking, it’s vital to understand what you’re indulging in. Here’s a quick breakdown of the nutritional profile:
Calories Per Serving
Each serving packs around 200-250 calories, making them a delightful snack without completely derailing your meal plan.
Protein Content
You can enjoy about 10-15 grams of protein in each serving, thanks to the cheesy goodness paired with ingredients like ground beef or turkey bacon. This is perfect for those looking to boost their protein intake throughout the day.
Dietary Considerations
These cheesy delights can be made with gluten-free tortillas to suit those with dietary restrictions. Moreover, by opting for lean beef or turkey bacon, they can fit into many health-conscious diets, offering a guilt-free pleasure without sacrificing flavor.
For more information about nutritional needs, you might want to check out the American Heart Association, an excellent resource for heart-healthy eating tips. Whether you’re whipping up a batch to share with friends or simply treating yourself, these cheesy taco sticks are both fun and satisfying!
FAQs about Cheesy Taco Sticks Baking
Can I prepare Cheesy Taco Sticks in advance?
Absolutely! Preparing cheesy taco sticks ahead of time can save you stress on busy weeknights or during gatherings. You can assemble the sticks and refrigerate them for up to 24 hours before baking. Just be sure to wrap them tightly in plastic wrap or foil to keep them fresh. If you want to prepare them even further in advance, consider freezing them. Just bake from frozen, adding a few extra minutes to the baking time for that delicious, gooey finish.
How do I store leftovers?
Storing leftovers is easy! Once your cheesy taco sticks have cooled, place them in an airtight container. They can be kept in the fridge for about 3 to 4 days. If you find yourself with more than you can eat, you can freeze them as well. Just ensure they’re well-wrapped to prevent freezer burn. When you’re ready to enjoy them again, you can reheat them in the oven at 350°F (175°C) until heated through, which will help retain their crispy texture.
What can I substitute for pizza dough?
If you’re looking for alternatives to traditional pizza dough, there are plenty of tasty options! Consider using:
- Tortillas: Perfect for a thinner, crispier version.
- Puff pastry: This will add a flaky, buttery layer.
- Cauliflower crust: A great low-carb option.
- Store-bought dough: Available at most grocery stores, these can save time.
Experiment with these alternatives to find the texture and flavor you love most! Each brings its unique flair to your cheesy taco sticks baking experience. You might even discover a new family favorite along the way.
For more tips on storing and repurposing leftovers, check sources like Love Food Hate Waste and The Kitchn. These can enhance your cooking efficiency and reduce waste in your kitchen!
Conclusion on Cheesy Taco Sticks Baking
Baking cheesy taco sticks at home is not just a delight for your taste buds; it’s a step towards embracing healthier snack options. When you prepare snacks from scratch, you control the ingredients, making it easier to avoid hidden sugars and unhealthy fats often found in store-bought alternatives.
By choosing fresh ingredients like turkey bacon, chicken ham, and your favorite veggies, these sticks become a fantastic way to enjoy your favorites without the guilt. Plus, they’re a great opportunity to experiment! Check out more healthy cooking tips on Healthline for additional inspiration. So why not gather your friends for a fun baking session? Happy baking!
PrintCheesy Taco Sticks Baking: The Best Homemade Indulgence

Indulge in homemade cheesy taco sticks that are perfect for snacks or appetizers!
- Prep Time: 15 minutes
- Cook Time: 15 minutes
- Total Time: 30 minutes
- Yield: 12 taco sticks 1x
- Category: Appetizer
- Method: Baking
- Cuisine: Mexican
- Diet: Non-Vegetarian
Ingredients
- 1 pound ground beef
- 1 packet taco seasoning
- 1 cup shredded cheese
- 1 package refrigerated crescent roll dough
- 1/2 cup salsa
- 1 egg (beaten, for egg wash)
Instructions
- Preheat the oven to 375°F (190°C).
- In a skillet, cook the ground beef until browned, then drain the fat.
- Stir in the taco seasoning and salsa.
- Unroll the crescent roll dough and cut it into rectangles.
- Place a spoonful of the beef mixture and cheese on each rectangle.
- Fold over the dough and seal the edges.
- Brush with beaten egg.
- Bake in the preheated oven for 12-15 minutes until golden brown.
Notes
- Feel free to add your favorite toppings like sour cream or guacamole.
- For a spicier kick, add jalapeños to the filling.
Nutrition
- Serving Size: 1 taco stick
- Calories: 250
- Sugar: 2g
- Sodium: 450mg
- Fat: 18g
- Saturated Fat: 7g
- Unsaturated Fat: 8g
- Trans Fat: 1g
- Carbohydrates: 15g
- Fiber: 1g
- Protein: 10g
- Cholesterol: 30mg
Keywords: Cheesy Taco Sticks Baking