Introduction to Artisan Bread
Why make homemade artisan bread?
Have you ever walked past a bakery and inhaled the delicious aroma of fresh artisan bread? The crusty exterior, the soft, warm interior, and that tantalizing flavor just beg to be enjoyed. Making your own artisan bread at home isn’t just about satisfying cravings; it’s a wonderful way to connect with the food you eat. Plus, there’s an undeniable joy that comes with pulling a warm loaf from the oven, knowing you crafted it from scratch.
There’s a certain magic in the simplicity of baking. Using just a few ingredients—flour, water, salt, and yeast—you can create something truly special. But don’t just take my word for it; the process has been embraced by many as both a hobby and an art form. For step-by-step guidance on making this delightful loaf, check out King Arthur Baking.
The benefits of baking your own bread
So, why should you choose to embark on this baking journey? Here are a few compelling reasons:
-
Healthier Ingredients: When you bake your own artisan bread, you get to choose high-quality, organic ingredients. You know exactly what’s going into your loaf, avoiding preservatives and additives found in store-bought varieties.
-
Cost-Effective: While the initial investment in ingredients and equipment might seem steep, think about it: a loaf of freshly baked artisan bread often costs significantly less than buying premium bread at the store.
-
Creativity and Experimentation: Baking is a fantastic outlet for creativity! You can try different flour types, incorporate nuts or herbs, and play around with shapes and sizes. It’s a fun, unique way to express yourself.
-
Rewarding Experience: Nothing beats the satisfaction of slicing into that first, warm piece of bread, preferably topped with a bit of butter or your favorite spread. It’s the perfect accompaniment for any meal, making everything from turkey bacon sandwiches to breakfast toast a delight.
Artisan bread baking can truly transform your daily routine into something more rewarding and delicious. As you get started with your artisan bread recipe, you’ll find that every loaf tells a story that’s uniquely yours.
Ingredients for Artisan Bread
Essential ingredients for the best artisan bread
Creating the perfect artisan bread starts with a simple but effective set of ingredients. When you gather your materials, make sure to include:
- High-quality flour: Bread flour is ideal due to its high protein content, which helps develop gluten and results in a lovely chewy texture.
- Water: Use filtered or bottled water for a pure flavor; hydration is key to achieving that crusty exterior.
- Yeast: Active dry yeast or instant yeast is typically preferred, as these can provide a reliable rise.
- Salt: A crucial ingredient that enhances flavor; don’t skimp on this!
- Optional sourdough starter: For those seasoned bakers, using a starter adds a depth of flavor and complexity.
For a deeper dive into the science of baking, check out this thorough article by King Arthur Baking.
Optional add-ins for flavor enhancement
If you want to elevate your artisan bread, consider these optional add-ins:
- Seeds and Nuts: Ingredients like sunflower seeds, pumpkin seeds, or chopped walnuts can add texture and flavor.
- Herbs and Spices: Fresh herbs such as rosemary or spices like garlic can introduce a lovely aromatic element.
- Dried Fruits: Adding ingredients like apricots or cranberries can provide a delightful sweetness, balancing the savory aspects.
These enhancements can transform your basic artisan bread recipe into something uniquely yours, making every loaf an exciting adventure in flavor.
Preparing Artisan Bread
Preparing artisan bread at home is a delightful journey that combines simple ingredients with a touch of creativity. Artisan bread is about embracing the process and making something special from scratch. Let’s dive into the steps that will guide you to create a beautiful loaf that you can be proud of!
Gather and Measure Ingredients
Before you start, it’s important to gather all the necessary ingredients. For any artisan bread recipe, you’ll typically need:
- Flour: Bread flour is preferable because of its higher protein content, which contributes to gluten development.
- Water: Use filtered or spring water for the best flavor.
- Yeast: Active dry yeast is commonly used – just make sure it’s fresh.
- Salt: This not only flavors the bread but also strengthens the dough’s structure.
Measuring accurately ensures consistency in your results. Invest in a kitchen scale for precise ingredient amounts, especially for flour and water, as different brands can vary in weight. A scale can make a world of difference in baking, allowing you to create that perfect loaf every time.
Mix the Dry Ingredients and Add Water
In a large mixing bowl, combine your measured flour, yeast, and salt. Here’s a pro tip: mix the salt on one side of the bowl and the yeast on the other before adding water. This prevents the salt from inhibiting the yeast’s action immediately.
Next, slowly pour in the water, mixing with a wooden spoon or your hands until there are no dry bits left. The beauty of artisan bread lies in its rustic texture; don’t worry about achieving perfection here. Leave the dough a bit shaggy, as this means you’re on the right track!
For a deeper dive into mastering bread-making, you might check out this bread science resource, which delves into how each element interacts in the dough.
Allow the Dough to Rise
Once mixed, cover the bowl with a clean kitchen towel or plastic wrap. Let it rise in a warm, draft-free area for about 4 to 8 hours, or until it has doubled in size. This long fermentation will develop flavor and texture.
During the rising phase, take a moment to relax or envision what you’ll serve alongside your artisan bread. Maybe a delightful olive oil dip, or paired with a satisfying soup? The possibilities are endless!
Shape the Dough
After the dough has risen beautifully, it’s time to shape it. Flour your work surface lightly, turn out the dough, and gently stretch it into a rectangle. Fold the sides in, then roll it up from the bottom. Place the seam side down in a floured proofing basket or bowl. Cover it and allow it to rest for another 30 minutes to an hour.
This shaping technique not only creates structure but also builds confidence. It’s amazing to see how your dough evolves through these simple folds!
Preheat the Oven for Baking
While your dough is resting, it’s the perfect time to preheat your oven. Set it to 450°F (232°C) and place a Dutch oven or baking stone inside to heat up. Preheating is crucial for achieving that nice crust that artisan bread is known for.
Make sure to also have a bowl of water ready to create steam in the oven; this is what helps develop the crust during baking!
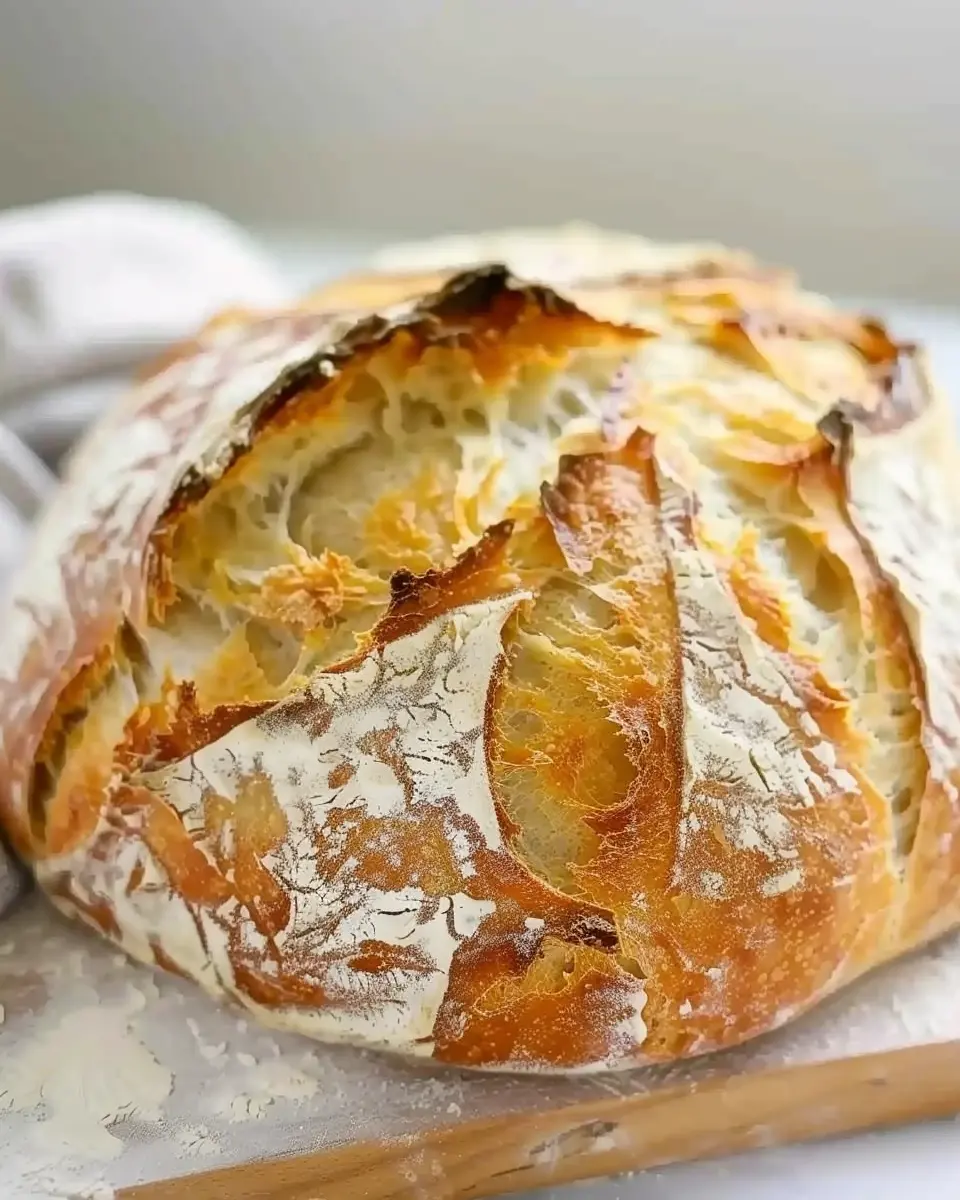
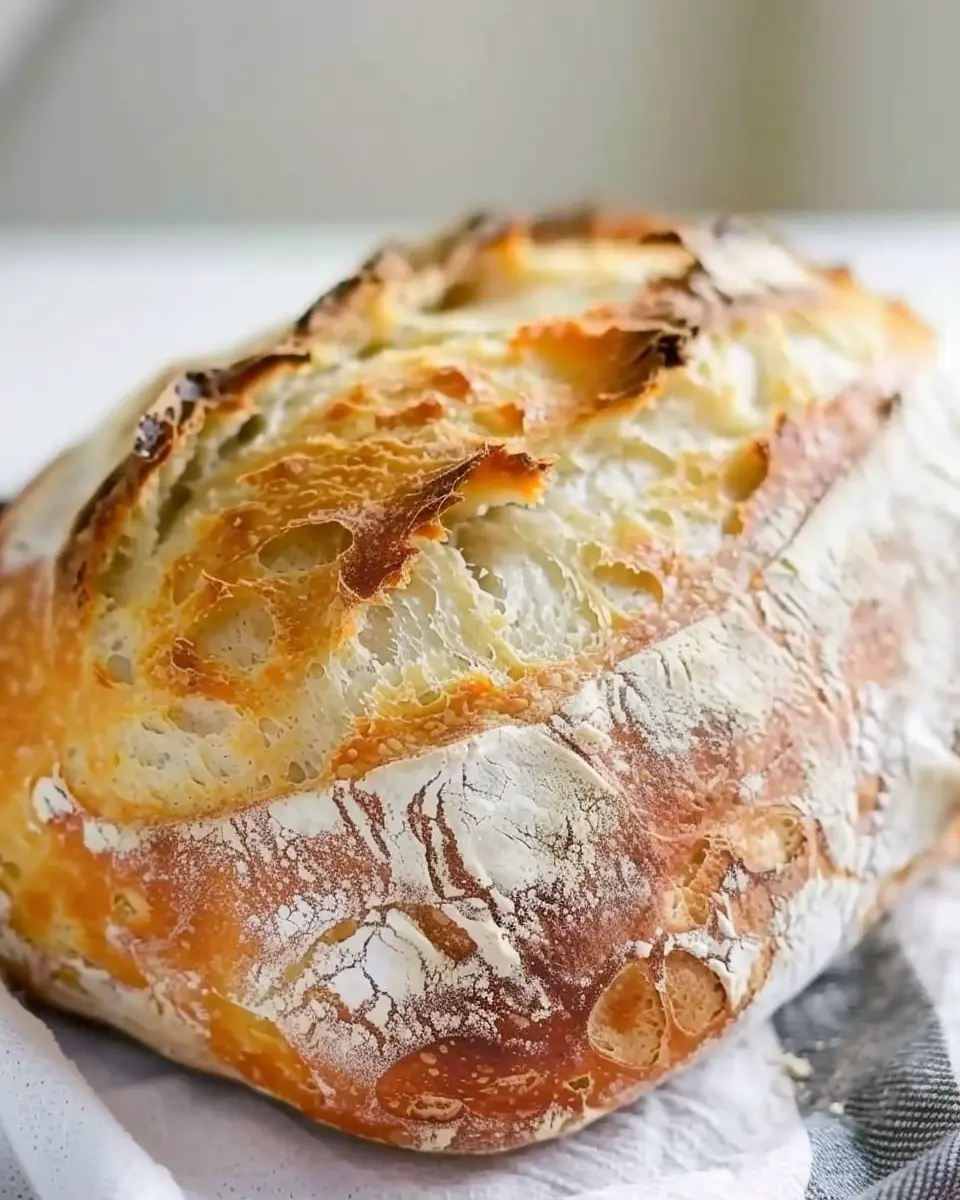
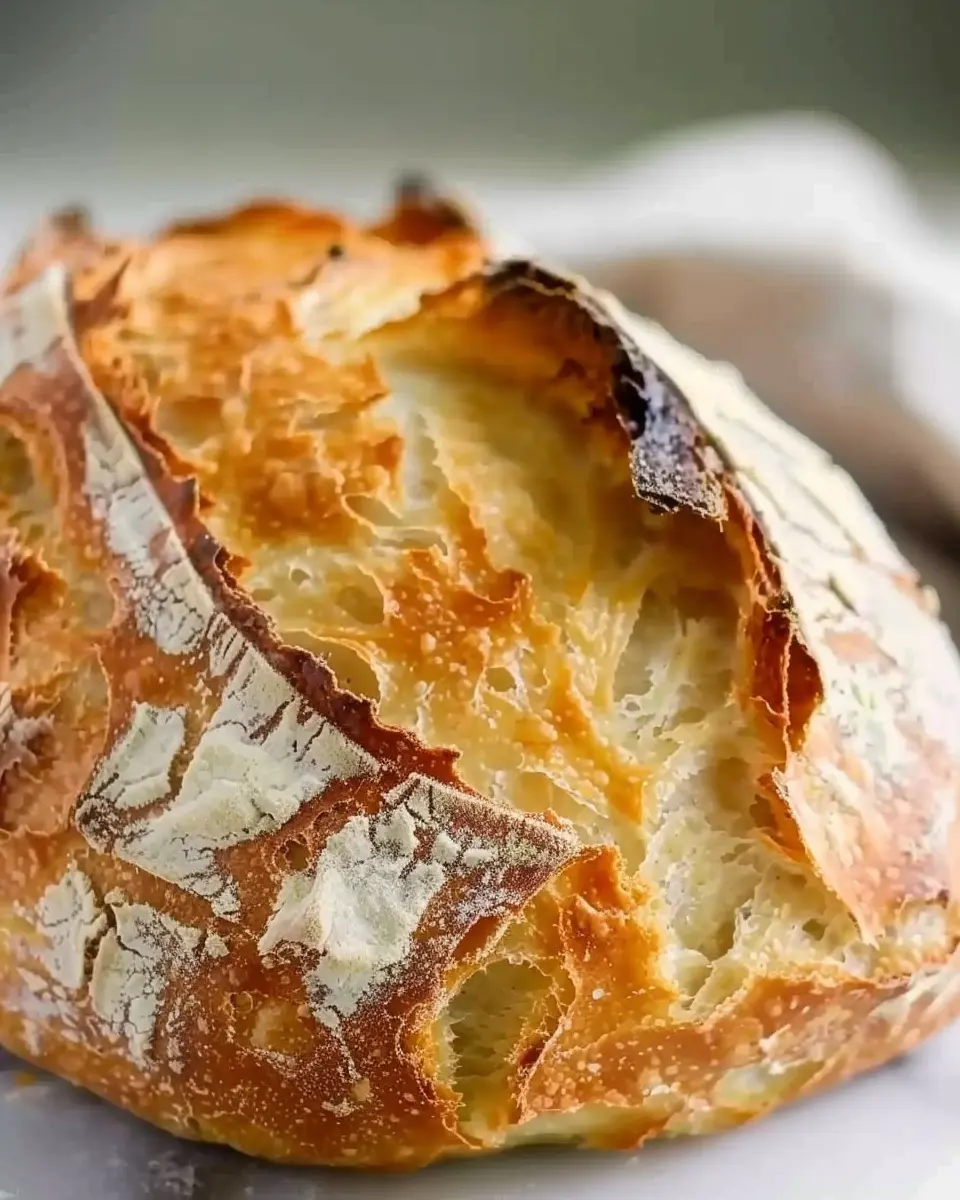
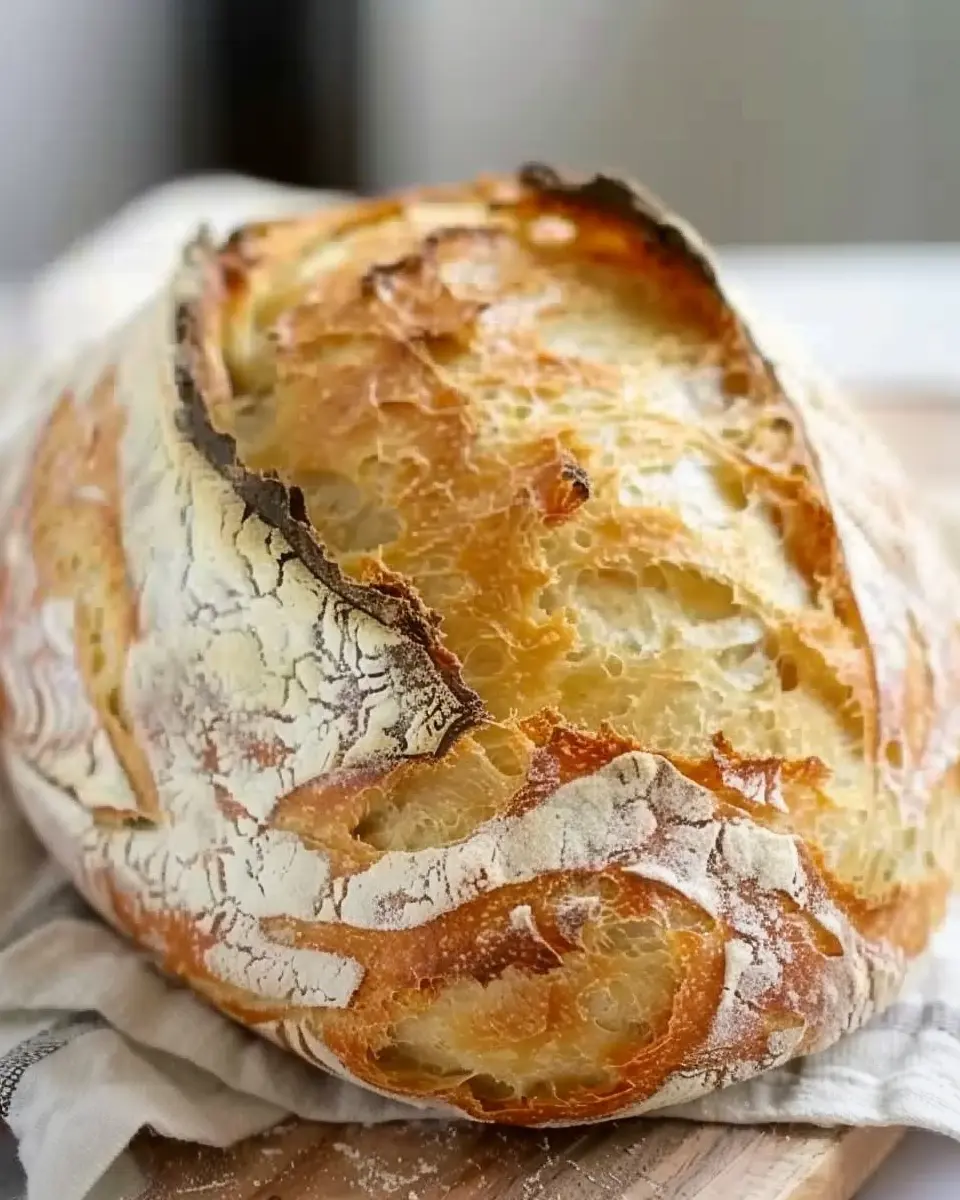
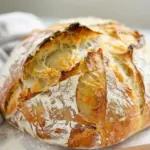
Bake the Bread to Perfection
Once your oven is ready, carefully remove the hot Dutch oven. Transfer your dough into it, cover it with the lid, and bake for 30 minutes. Then, remove the lid and bake for an additional 15 to 20 minutes until the loaf is golden brown and sounds hollow when tapped on the bottom.
This moment is what you’ve been waiting for! As the artisan bread bakes, your kitchen will fill with an irresistible aroma. Allow the loaf to cool on a wire rack before slicing — if you can resist! You’ll appreciate the crunchy crust and soft, airy interior.
By following these thoughtful steps, you’ll not only have homemade artisan bread but also an experience to cherish. Happy baking!
Variations on Artisan Bread
Artisan bread isn’t just a marvel of texture and flavor; it’s also a blank canvas for your culinary creativity. Let’s dive into some delightful variations to elevate your artisan bread recipe beyond the basics.
Adding Herbs and Spices for Flavor
Imagine slicing into a loaf infused with fresh herbs like rosemary or thyme. Adding herbs can transform the aroma and taste of your bread. Here are some ideas:
- Chopped Oregano: A classic addition that’ll complement your favorite pasta dishes.
- Garlic Powder: For that savory kick, a teaspoon of garlic powder can work wonders.
- Chili Flakes: Spice it up for a bread that pairs beautifully with soups.
You can even experiment with sweet spices like cinnamon or nutmeg for a dessert version—perfect for that brunch gathering!
Incorporating Nuts and Seeds
Nuts and seeds not only provide a delightful crunch but also boost the nutritional value of your bread. Consider mixing in:
- Walnuts or Pecans: Add a hearty texture and earthy flavor.
- Sunflower Seeds or Pumpkin Seeds: These are fantastic sources of protein and add a great bite.
- Flaxseed: For health benefits, it’s an excellent addition packed with omega-3s.
These ingredients bring depth and elevate your baking game, making each slice a wholesome experience.
Exploring Cheese and Olive Variations
Cheese and olives introduce a savory richness to your artisan bread recipe. Think outside the box and consider:
- Feta or Parmesan: Crumbled or shredded, they melt beautifully during baking.
- Olives: Kalamata or green olives add a Mediterranean flair.
What if we blended a combo of cheese and olives? Talk about a flavor explosion! Each loaf can tell a story, transporting you straight to a quaint café in Italy.
Feeling inspired? Get creative with your artisan bread, and share your favorite variations. What will you try first?
Baking notes for Artisan Bread
Tips for achieving the perfect crust
When it comes to your artisan bread recipe, a great crust begins before you even turn on the oven. Consider these tips:
- Preheat your oven thoroughly: A hot oven sets the stage for a crisp crust. Aim for at least 450°F (230°C) for optimal results.
- Use a baking stone or steel: These retain heat and promote an even baking surface, leading to that wonderful crunchy exterior.
- Don’t skimp on the time: Allow your loaf to rise properly before baking. A well-proofed dough translates to better texture and flavor.
The importance of steam in baking
Steam is your secret weapon in artisan bread making. Why so? Here are a few reasons:
- Promotes oven spring: The steam allows the dough to expand more during the first few minutes of baking, leading to a taller loaf.
- Creates a beautiful crust: A steamy environment helps develop a glossy, crunchy crust that makes your bread extra enticing.
To add steam, you can place a pan of hot water at the bottom of your oven or use a spray bottle just after loading your dough. Explore more about steam baking techniques here. Happy baking!
Serving Suggestions for Artisan Bread
Pairing Suggestions for Sauces and Spreads
Once you’ve mastered your artisan bread recipe, indulging in it becomes all about the perfect pairings. Consider spreading creamy butter or herbed cheese for a delicious start. If you’re up for something adventurous, try a zesty chimichurri or a roasted red pepper hummus. These spreads not only enhance the flavors but create an inviting centerpiece for your next gathering. If you want to dive deeper into gourmet spreads, websites like Serious Eats offer excellent recipes that use local ingredients to elevate your bread experience.
Using Artisan Bread in Sandwiches
Let’s talk sandwiches! Your freshly baked artisan bread is a dream base for a variety of fillings. Imagine a slice piled high with turkey bacon and fresh avocado, drizzled with a tangy mustard. Or go for a delightful combination of roasted vegetables and chicken ham topped with peppery arugula. Sandwiches made with artisan bread not only look good but feel hearty and satisfying. Don’t shy away from experimenting—mix it up with different condiments or toppings, and you’ll never have a boring lunch again!
With each bite, you’ll appreciate how your artisan bread recipe can elevate even the simplest meals. Enjoy the process, and remember to share your creations!
Tips for Making Perfect Artisan Bread
The Key to a Crispy Crust
Getting that beautiful, crispy crust on your artisan bread is all about the baking environment. Here are some tips to help you achieve it:
- Steam: Create steam in your oven during the first few minutes of baking. This helps the crust to develop. You can place a shallow pan filled with hot water at the bottom of the oven or even spray water on the walls right before closing the door.
- Preheat Properly: Ensure your oven is fully preheated to the right temperature. A hot oven is crucial to get that initial rise and crust development.
- Use a Baking Stone: If you have one, a baking stone can help to maintain even heat and achieve a perfectly baked loaf.
Tricks for Storing and Reheating Bread
Once you’ve mastered your artisan bread recipe, it’s essential to know how to store it for maximum freshness:
- Storage: Keep your bread in a paper bag at room temperature for a day or two. For longer storage, slice it and freeze it in an airtight bag. This keeps it fresh while allowing for easy reheating.
- Reheating: To revive your bread, place it in a preheated oven at 350°F (175°C) for about 10 minutes. This will restore its crustiness without drying it out.
Enjoy your baking journey! For more tips, check out resources like the King Arthur Baking site, where expert bakers share insights.
Time Breakdown for Artisan Bread
When you’re ready to embark on your artisan bread recipe, understanding the time involved can help you plan better. Here’s a quick breakdown:
Preparation Time
Set aside about 20-30 minutes for the prep work. You’ll be mixing your ingredients, so don’t rush! This is where your dough begins to come alive.
Rising Time
The rising time is where the magic happens, taking approximately 2-3 hours. This allows the dough to ferment, developing those lovely flavors and textures. You can even let it rise overnight in the fridge for a fuller taste.
Baking Time
When it’s time to bake, you’ll need about 30-35 minutes. Preheat your oven while the dough rests to ensure a beautiful crust.
Total Time
In total, expect around 3-4 hours, acknowledging that most of this is hands-off rising time. You might be wondering, “Can I fit this in during a busy day?” Absolutely! You’ll find the process quite rewarding. For more tips on managing time in kitchen recipes, check out Serious Eats.
Happy baking!
Nutritional Facts for Artisan Bread
Calories per slice
One slice of homemade artisan bread typically contains around 80-100 calories, depending on the specific ingredients used and portion size. This makes it a great choice for enjoying with your favorite spreads or as a sandwich base without overloading on calories.
Nutritional breakdown
When diving into the nutritional profile of this artisan bread recipe, here’s what you can generally expect:
- Carbohydrates: Approximately 15-20 grams (primarily from the flour)
- Protein: About 3-4 grams (can be enhanced by using whole grain or high-protein flours)
- Fat: Ranges from 1-2 grams (minimal if no fats are added)
This wholesome bread is not just delicious; it also provides a decent source of energy and sustenance. Incorporate it into balanced meals alongside vegetables and protein for optimal nutrition. For more detailed nutritional guidance, you might want to explore resources like the USDA FoodData Central for comprehensive food profiles.
Did you know that artisan bread can also be a great vehicle for nutrient-rich toppings? Packed with fiber and complex carbohydrates, it supports sustained energy levels throughout your busy day. What toppings do you enjoy?
FAQs about Artisan Bread
How long can I store homemade artisan bread?
When it comes to enjoying your fresh artisan bread, the ideal storage time is usually a few days. If stored at room temperature in a paper bag, it can last for about 2 to 3 days. For longer storage, consider slicing your bread and placing it in an airtight container or wrapping it tightly in plastic wrap before freezing. This way, it can stay fresh for up to three months! Just remember to let it cool completely before freezing to maintain that delicious texture.
What do I do if my bread doesn’t rise?
A common concern among home bakers is dealing with bread that refuses to rise. If your artisan bread recipe just isn’t cooperating, take a moment to evaluate a few key factors:
- Yeast freshness: Ensure your yeast is not expired. Fresh yeast is vital for proper fermentation.
- Water temperature: Using water that’s too hot can kill the yeast. Aim for lukewarm temperatures (around 100°F or 37°C).
- Kneading: Make sure you’re kneading well! Proper gluten development helps your bread rise beautifully.
If you encounter persistent issues, check out troubleshooting resources, like those from King Arthur Baking, to gain insights.
Can I adjust the recipe for whole wheat flour?
Absolutely! If you’d like to make a whole wheat artisan bread version, simply substitute up to 50% of the all-purpose flour with whole wheat flour. Keep in mind that whole wheat absorbs more moisture, so you might need to add a bit extra water or let the dough rest longer to ensure proper hydration. Don’t hesitate to experiment—the heart of artisan baking is all about creativity!
For more tips and variations, explore expert recommendations on sites like The Bread Lab. Happy baking!
Conclusion on Artisan Bread
The joy of sharing your homemade bread
Baking your own bread is more than just a cooking task; it’s an experience to cherish. Imagine the delight on friends’ and family members’ faces as you present your freshly baked artisan bread. Sharing your creation not only elevates their day but also strengthens bonds over simple pleasures. The aroma of warm bread often sparks nostalgia and conversation, making every meal just a bit more special.
Encouragement to experiment with baking
Don’t be afraid to tweak your artisan bread recipe. Mix in your favorite herbs, try different types of flour, or explore alternative shapes. Baking is a journey of creativity, and every loaf can reflect your style. The beauty of this craft lies in the endless possibilities, making it an excellent opportunity for self-expression. Dive in, have fun, and remember that even minor missteps can lead to delicious surprises! For more inspiration and ideas, check out the King Arthur Baking Journal which offers a wealth of tips and home baking stories from fellow enthusiasts.
PrintArtisan Bread Recipe: Easy Steps to Homemade Perfection
Learn how to make delicious artisan bread at home with this easy-to-follow recipe.
- Prep Time: 15 minutes
- Cook Time: 45 minutes
- Total Time: 13 hours
- Yield: 1 loaf 1x
- Category: Breads
- Method: Baking
- Cuisine: American
- Diet: Vegetarian
Ingredients
- 3 cups all-purpose flour
- 1.5 teaspoons salt
- 1 teaspoon instant yeast
- 1.5 cups warm water
Instructions
- In a large bowl, mix together the flour, salt, and yeast.
- Add the warm water and mix until a sticky dough forms.
- Cover the bowl and let it rest for 12-18 hours at room temperature.
- Once doubled in size, turn the dough out onto a floured surface and shape it into a loaf.
- Let the loaf rise for another 1-2 hours.
- Preheat the oven to 450°F (230°C) and place a Dutch oven inside to heat up.
- Carefully transfer the loaf into the Dutch oven and cover.
- Bake for 30 minutes covered, then remove the lid and bake for an additional 15 minutes.
- Cool before slicing and enjoy!
Notes
- For a crustier bread, place a dish of water in the oven while baking.
- Experiment with different types of flour for varying flavors.
Nutrition
- Serving Size: 1 slice
- Calories: 150
- Sugar: 0.5g
- Sodium: 400mg
- Fat: 1g
- Saturated Fat: 0g
- Unsaturated Fat: 0.5g
- Trans Fat: 0g
- Carbohydrates: 30g
- Fiber: 1g
- Protein: 5g
- Cholesterol: 0mg
Keywords: artisan bread, homemade bread, easy bread recipe