Introduction to Classic Cannoli Squares
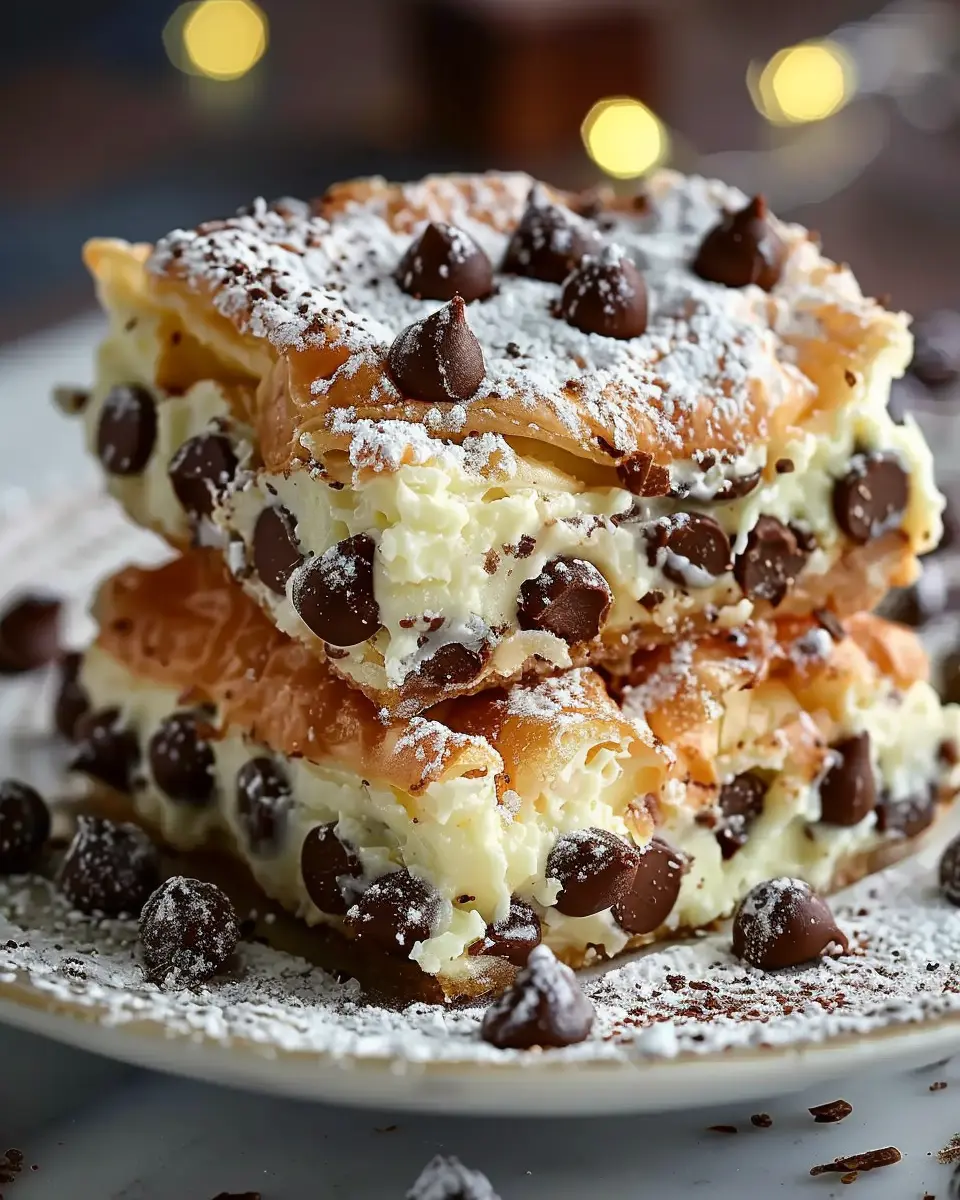
When you think about traditional Italian desserts, cannoli inevitably come to mind. Their crispy shells and rich, creamy fillings are a delight! But have you ever considered the ease and charm of classic cannoli squares? These delectable treats are a fantastic way to enjoy the flavors of cannoli in a more accessible form, ideal for gatherings, celebrations, or simply satisfying your sweet tooth at home.
Why Cannoli Squares are a Must-Try for Homemade Desserts
One of the best things about classic cannoli squares is their simplicity. Unlike traditional cannoli, which requires piping the filling into each shell, these squares allow you to combine the crunchy and creamy elements into a cohesive dessert that’s ready to serve in just a few steps!
- Time-Saving: You’ll save time standing at the pastry counter. Instead, mix your ingredients and pour them into a pan—less fuss, more fun!
- Shareable: The square shape provides generous portions, perfect for sharing with friends during a casual get-together, or even as a showstopper at a dinner party.
Imagine pulling these squares from the refrigerator, beautifully garnished with chocolate chips and a sprinkle of powdered sugar. Your guests will be impressed by your culinary prowess without you needing to spend hours in the kitchen. In many ways, these squares capture the essence of celebration and good company.
For those of you navigating a busy lifestyle, this dessert is not only easy to make, but it also offers a chance to showcase your baking skills without the pressure. Plus, according to a recent culinary article on modern dessert trends, accessible and sharable dessert options are gaining popularity, especially among young professionals looking to impress.
So if you’re craving that iconic cannoli flavor without the extra hassle, classic cannoli squares might just be your new go-to recipe. They uphold everything you love about this classic treat while introducing a more modern twist. Get ready to indulge in a dessert that’s as delightful in flavor as it is easy to make!
Ingredients for Classic Cannoli Squares
Making classic cannoli squares is all about combining the right ingredients for that perfect balance of creamy filling and crunchy crust. Here’s what you’ll need to create this delightful dessert that’s sure to impress your friends and family!
Filling Ingredients
The filling is where the magic happens:
- Ricotta cheese: Aim for whole milk ricotta for the creamiest texture.
- Powdered sugar: Sweeten to taste; adjust based on your preference.
- Vanilla extract: A splash adds depth.
- Mini chocolate chips: Because who can resist a bit of extra chocolate?
Crust Ingredients
The base of your classic cannoli squares needs to be just right:
- Graham cracker crumbs: These provide a lovely crunch.
- Butter: Melted, to hold everything together.
- Cinnamon: A touch for warmth and flavor.
- Sugar: Enhances the sweetness of the crust.
Optional Garnishes
To elevate your classic cannoli squares, consider these garnishes:
- Chopped pistachios: For a pop of color and flavor.
- Extra chocolate chips or drizzle: Always a crowd-pleaser.
- Powdered sugar: A dusting on top for a classic touch.
Now that you have your ingredients, aren’t you excited to get started? These elements come together beautifully to create a dessert that’s both satisfying and impressive. You can also find more about the health benefits of using quality ingredients like ricotta on research trusted sites like Healthline. Happy baking!
Step-by-Step Preparation of Classic Cannoli Squares
Creating classic cannoli squares at home is a delightful culinary adventure that fills your kitchen with sweet aromas. Let’s break it down step by step to ensure your baking experience is as smooth as the ricotta filling!
Prepare the Cannoli Filling
First things first! The cannoli filling is the star of this dish, so let’s get it just right. For the filling, you need:
- 15 ounces of ricotta cheese (drained)
- 1 cup of powdered sugar
- 1 teaspoon of vanilla extract
- 1/2 cup of mini chocolate chips (because who can resist chocolate?)
- 1 teaspoon of ground cinnamon (optional, but it adds depth)
- In a mixing bowl, combine the ricotta cheese with the powdered sugar and vanilla extract.
- Mix until you achieve a smooth, creamy texture. This mixture should be thick but spreadable.
- Gently fold in the mini chocolate chips and cinnamon, if using. Taste your filling to make sure it’s just as sweet as you like!
You can find more tips on perfectly creamy fillings over at Serious Eats.
Preheat the Oven
Before we dive into assembling our classic cannoli squares, let’s get the oven preheating. Set it to 350°F (175°C). Preheating is crucial for an even bake and golden crust, so don’t skip this step!
Roll Out the Pie Crust
Next up is the pie crust—our canvas for this tasty creation. You can use a store-bought pie crust for convenience or whip up a homemade version if you’re feeling adventurous.
- Unroll your pie crust on a lightly floured surface. If needed, gently roll it out to ensure it fits your baking dish.
- Aim for a thickness of about 1/8 inch; this ensures that the crust remains flaky while holding the filling.
If you want a thicker base, feel free to adjust—just keep an eye on the baking time, as thicker crusts can take longer.
Assemble the Squares
Now comes the fun part: assembling your classic cannoli squares!
- Cut the rolled-out pie crust into rectangle shapes that will fit in your baking dish—generally, 2 inch by 3 inch works well.
- Place half of the rectangles into a greased baking dish, ensuring there’s a little space between each.
- Spread a layer of your delicious cannoli filling over these crust pieces.
- Top with the remaining dough rectangles, creating a sort of “ccanoil sandwich.”
Brush the tops with a little melted butter and sprinkle some additional powdered sugar for a touch of sweetness.
Bake to Perfection
Now, slide those assembled squares into the preheated oven. Bake for 25-30 minutes, or until the tops are golden brown. The smell wafting from your oven will be irresistible!
Pro tip: Keep an eye on them, as oven temperatures can vary. You want the tops to have a lovely golden hue without over-baking them.
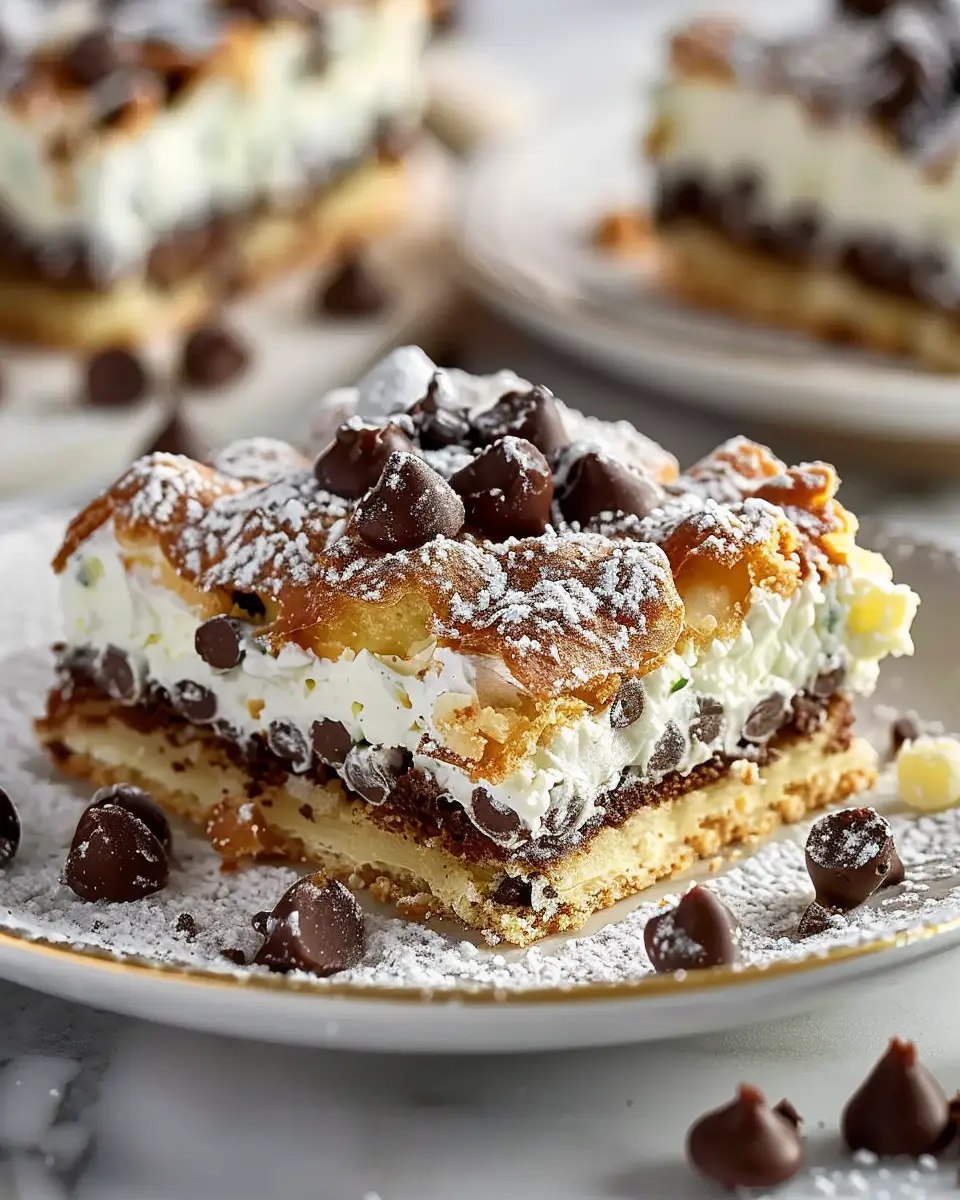
Cool and Cut into Squares
Once baked, remove your classic cannoli squares from the oven and allow them to cool in the dish. Cooling prevents the filling from oozing out when you cut into them!
- Once cool, use a sharp knife to cut them into squares.
- For an extra touch, consider dusting each square with more powdered sugar before serving—because who doesn’t love that classic finishing touch?
Enjoy your delightful classic cannoli squares as a dessert at dinner or just a sweet treat during your afternoon break! These squares are sure to impress friends and family alike, and who knows? You might end up being the go-to dessert maker in your circle!
For additional baking tips and variations, check out culinary experts on BBC Good Food. Happy baking!
Variations of Classic Cannoli Squares
Are you ready to take your classic cannoli squares to the next level? These delectable treats offer an inviting base for a variety of flavors. Let’s dive into a few mouth-watering variations that will elevate your dessert game and impress your friends.
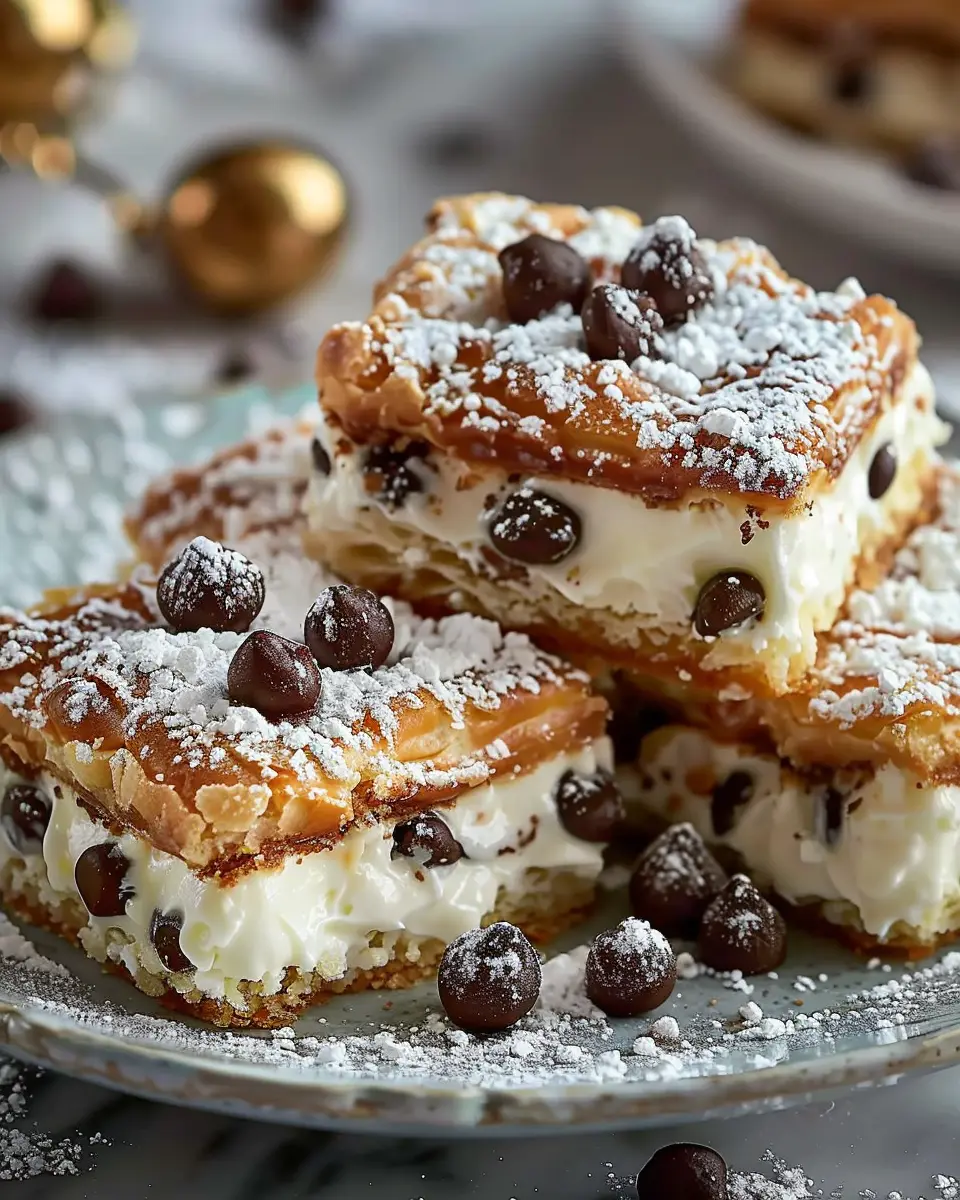
Chocolate Chip Cannoli Squares
Indulging in chocolate chip cannoli squares is like having the best of both worlds—traditional cannoli meets gooey chocolate bliss! Simply fold miniature chocolate chips into your ricotta fill before spreading it onto the crust. This remix not only adds a rich, chocolaty twist but also gives a delightful textural contrast. Looking for the perfect chocolate chips? Check out resources like Cocoa & Chocolate for high-quality options.
Pistachio Cannoli Squares
For a nutty experience, try pistachio cannoli squares. The vibrant green hue and subtle flavor make these squares a showstopper. Incorporate finely chopped pistachios into the filling. If you want an extra pop, consider garnishing the top with crushed pistachio pieces. Not only does this provide a pleasing crunch, but it also adds an elegant touch. Did you know that pistachios are high in protein and healthy fats? They truly make this variation a deliciously nutritious option.
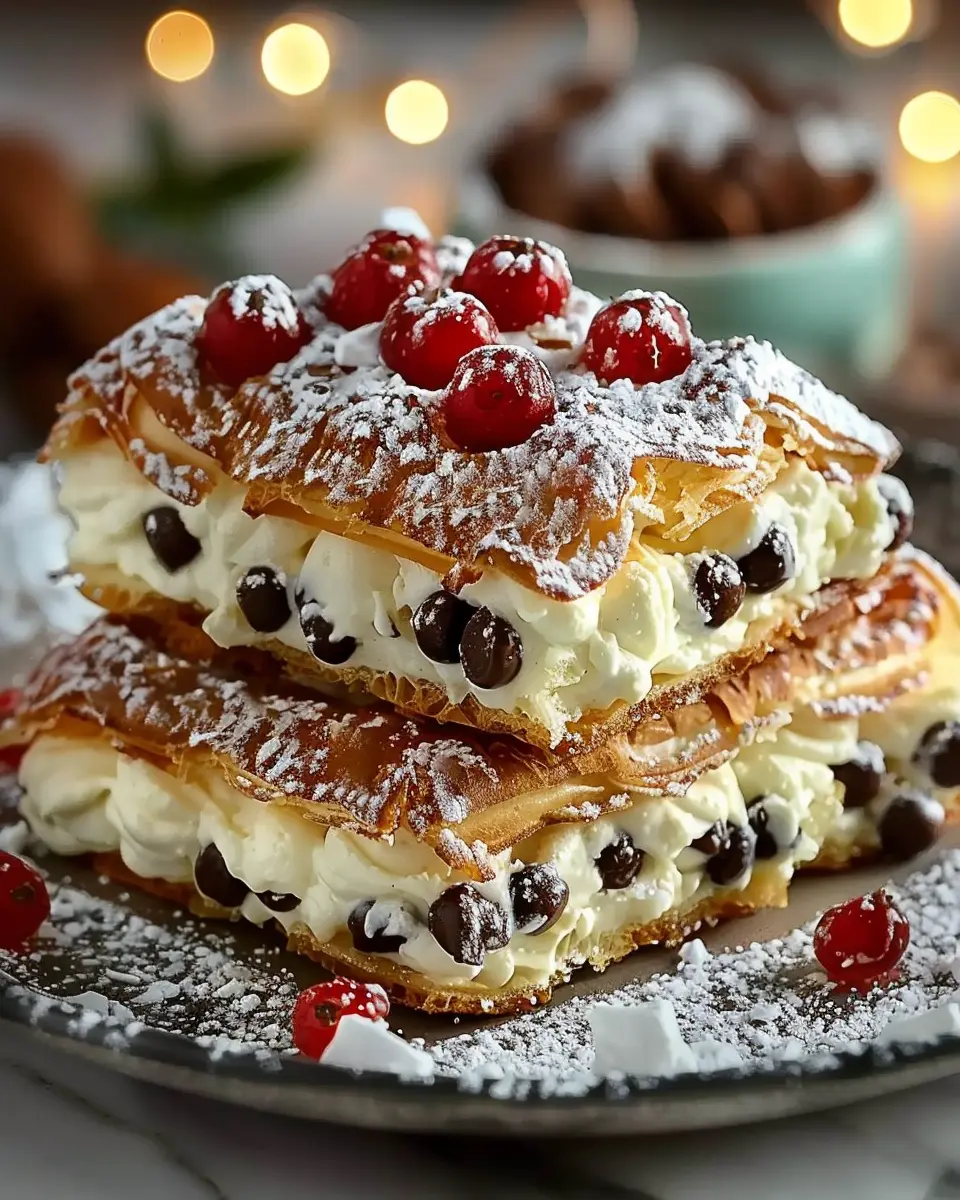
Fruit-Filled Cannoli Squares
Feeling fruity? Fruit-filled cannoli squares bring a refreshing twist perfect for warm weather! Add fresh berries, like strawberries or blueberries, or finely chopped fruits such as mango or peach to your ricotta mixture. The natural sweetness and juiciness will balance well with the creaminess of the filling. This is an opportunity to experiment—what’s your favorite fruit combination?
Each of these variations allows you to personalize classic cannoli squares to your taste, making dessert not just a meal but a delightful experience!
Cooking Tips and Notes for Classic Cannoli Squares
The Importance of Choosing the Right Ricotta
When it comes to making classic cannoli squares, the ricotta you select can make or break your dessert. Aim for high-quality, fresh ricotta – preferably from a local cheese shop or an artisanal brand. Avoid the overly watery kinds often found in grocery stores, as these can lead to a soggy filling. Using whole-milk ricotta offers a creamier texture and richer flavor. If you have time, drain your ricotta in a fine mesh sieve to remove excess moisture for optimal results.
Tips for a Flakier Crust
A flaky crust is essential for classic cannoli squares. Here are a few pointers to help you achieve that perfect texture:
- Keep Your Ingredients Cold: Use very cold butter and chill your mixing bowl. This helps prevent the butter from melting into the dough too quickly.
- Don’t Overmix: Mix just until combined. Overworking the dough can lead to a tough crust.
- Chill Before Baking: Allow the assembled crust to chill before baking. This sets the layers well and promotes that desired flakiness.
Storing Leftovers Properly
If you’re lucky enough to have leftovers (which might be rare!), storing them properly is key to maintaining freshness. Keep your classic cannoli squares in an airtight container in the fridge for up to three days. If you need to store them longer, consider freezing the squares without the filling and then adding the filling when you’re ready to enjoy. This helps prevent the crust from getting too soggy.
For more delicious dessert ideas, check out The Kitchn and explore further!
Serving Suggestions for Classic Cannoli Squares
Ideal Pairings with Hot Beverages
When it comes to enjoying classic cannoli squares, pairing them with the right hot beverage can elevate your dessert experience. Picture this: you’ve just taken a bite of the sweet, creamy goodness, and the rich flavors are perfectly complemented by a fiery cup of espresso or a creamy macchiato. Not a coffee lover? Consider a warming chai tea, where the spices enhance the delicate ricotta filling. For a comforting treat, a spiced hot chocolate can turn your cannoli squares into the perfect cozy afternoon snack.
Creative Plating Ideas
Presentation matters just as much as taste! To showcase your classic cannoli squares, consider the following creative plating ideas:
- Layered Dessert Cups: Crumble the squares and layer them in a glass with whipped cream and chocolate shavings for an elegant twist.
- Dust with Cocoa Powder: A light dusting of cocoa powder adds a sophisticated touch that enhances the dessert’s visual appeal.
- Fresh Berries: Serve with a side of fresh berries for a splash of color and a refreshing contrast to the rich flavors.
These simple enhancements not only make your classic cannoli squares look stunning but also create a dessert experience that is sure to impress guests or elevate your own snack time. For more ideas on dessert plating, check out resources from food presentation experts like The Kitchn.
Time Breakdown for Classic Cannoli Squares
Preparation Time
Getting started on your classic cannoli squares doesn’t have to feel like a marathon. The preparation time typically takes about 20 minutes. During this phase, you’ll be mixing your ingredients, preparing your filling, and ensuring everything is prepped just right.
Baking Time
Once you’ve assembled your classic cannoli squares, the baking will take roughly 30 minutes. It’s during this time that your kitchen will start to smell divine, reminding you of Italian bakeries that perfectly balance tradition and modern culinary flair.
Total Time
Overall, you’re looking at a delightful 50 minutes from start to finish. This quick and sweet treat is not only easy to make but also a showstopper for any brunch or gathering! Need inspiration? Check out tips on perfecting your baking skills from sources like Bon Appétit or Serious Eats.
Nutritional Facts for Classic Cannoli Squares
When indulging in classic cannoli squares, it’s helpful to know a bit about their nutritional profile. After all, balancing deliciousness and health is key for many young professionals today.
Calories
These delightful treats typically contain around 250 calories per serving. It’s a reasonable indulgence for a dessert, especially when you consider the joy they bring!
Sugars
Expect about 15 grams of sugar in each square, providing that delightful sweetness without being overly sugary. You can always opt for a natural sweetener if you’re looking to reduce sugar intake without sacrificing flavor.
Protein Content
With roughly 5 grams of protein per serving, classic cannoli squares offer a small boost in this area. They can be a satisfying end to your meal, especially when paired with a protein-rich dish.
For more insights on balancing desserts with nutritional needs, check out Healthline’s nutritional guidelines and the USDA FoodData Central.
FAQs about Classic Cannoli Squares
Can I use low-fat ricotta for the filling?
Absolutely! Using low-fat ricotta for your classic cannoli squares can be a great way to cut some calories without sacrificing too much flavor. Keep in mind that the texture might be a little different—potentially creamier or a touch more watery. To mitigate this, you can strain the ricotta using cheesecloth for a few hours to remove excess moisture. This way, you’ll still achieve that perfect, indulgent filling while making a lighter version.
How can I make them gluten-free?
If you want to enjoy classic cannoli squares but follow a gluten-free diet, you’re in luck! Simply replace the all-purpose flour in the crust with a high-quality gluten-free flour blend. Look for blends specifically designed for baking, as they usually contain a mix of flours and starches that help mimic the texture of traditional flour-based crusts. Make sure to check that all other ingredients, like chocolate chips and vanilla extract, are gluten-free as well.
For more tips on gluten-free baking, consider checking out this comprehensive guide.
What is the best way to garnish my cannoli squares?
When it comes to garnishing your classic cannoli squares, you really want to elevate their presentation! Here are some fun ideas:
- Chocolate drizzle: A simple drizzle of melted chocolate can add a visually appealing finish.
- Chopped nuts: Sprinkle some pistachios or almonds for that extra crunch.
- Powdered sugar: A light dusting on top adds sweetness and a lovely aesthetic.
- Fresh fruit: A few berries on the side can provide a pop of color and freshness.
Feel free to mix and match these garnishes to suit your taste. Happy baking!
Conclusion on Classic Cannoli Squares
Why You Should Make Classic Cannoli Squares Today!
If you’re looking for a deliciously unique dessert that’s sure to impress, classic cannoli squares are a must-try! Imagine sharing these creamy, sweet treats with friends after a cozy dinner or simply indulging on a quiet evening. They’re not just easy to prepare, but their delightful texture and rich flavors will take you straight to a charming Italian café.
The beauty of these cannoli squares lies in their versatility—you can customize them with your favorite toppings, like chocolate chips or crushed pistachios. So why not treat yourself and your loved ones today? Dive into this delightful recipe, and you’ll have more than just dessert; you’ll create memories to savor. Plus, check out resources like Serious Eats for more fun dessert ideas!
As you whip up these classic cannoli squares in your kitchen, don’t forget to enjoy the process. Happy baking!
PrintClassic Cannoli Squares: Easy Indulgence for Homemade Bliss

Enjoy the rich flavors of classic cannoli in a delightful square form with this easy recipe!
- Prep Time: 20 minutes
- Cook Time: 0 minutes
- Total Time: 4 hours 20 minutes
- Yield: 12 servings 1x
- Category: Dessert
- Method: No-bake
- Cuisine: Italian
- Diet: Vegetarian
Ingredients
- 2 cups ricotta cheese
- 1 cup powdered sugar
- 1 teaspoon vanilla extract
- 1 cup mini chocolate chips
- 1 package graham crackers
- 1/2 cup heavy cream
- 1/4 cup chopped pistachios (for topping)
Instructions
- In a bowl, combine ricotta, powdered sugar, and vanilla extract.
- Fold in chocolate chips.
- Layer graham crackers at the bottom of a dish.
- Spread half of the ricotta mixture over the graham crackers.
- Add another layer of graham crackers and then the remaining ricotta mixture.
- Whip the heavy cream until stiff peaks form, then spread on top.
- Sprinkle with chopped pistachios.
- Chill for at least 4 hours before serving.
Notes
- For a more indulgent flavor, add a little bit of orange zest to the ricotta mixture.
- Ensure you let the squares chill long enough for the flavors to meld.
Nutrition
- Serving Size: 1 square
- Calories: 250
- Sugar: 15g
- Sodium: 100mg
- Fat: 18g
- Saturated Fat: 10g
- Unsaturated Fat: 6g
- Trans Fat: 0g
- Carbohydrates: 20g
- Fiber: 1g
- Protein: 5g
- Cholesterol: 35mg
Keywords: Classic Cannoli Squares, cannoli recipe, dessert squares, homemade cannoli