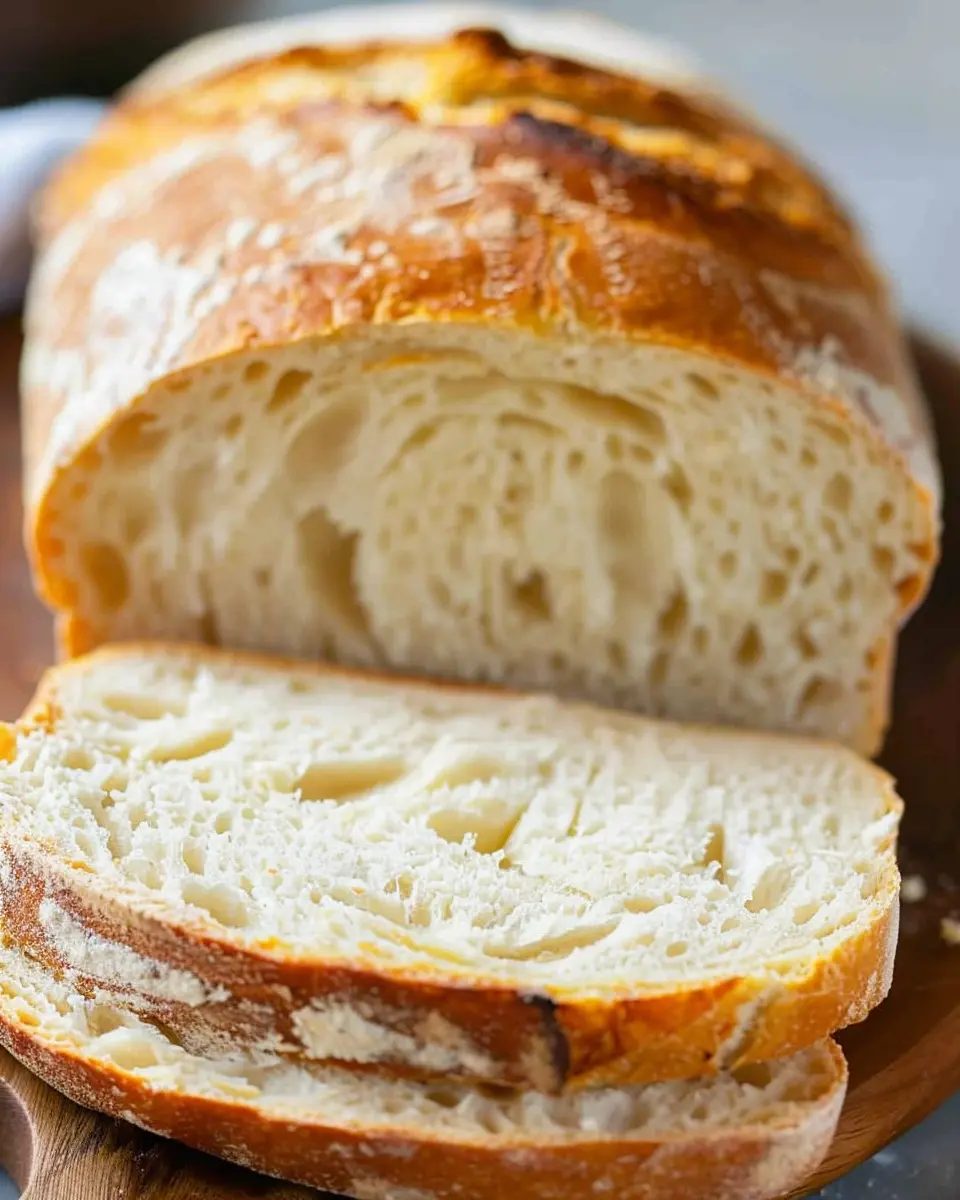
Introduction to Homemade Bread
Why Homemade Bread is the Ultimate Comfort Food
There’s something undeniably magical about the aroma of baked bread wafting through your home. It takes us back to cozy childhood memories, or perhaps a moment in a café where warm conversation and laughter mingled with the scent of fresh bread. Homemade bread isn’t just food; it’s an experience, a ritual that brings comfort and warmth to our everyday lives.
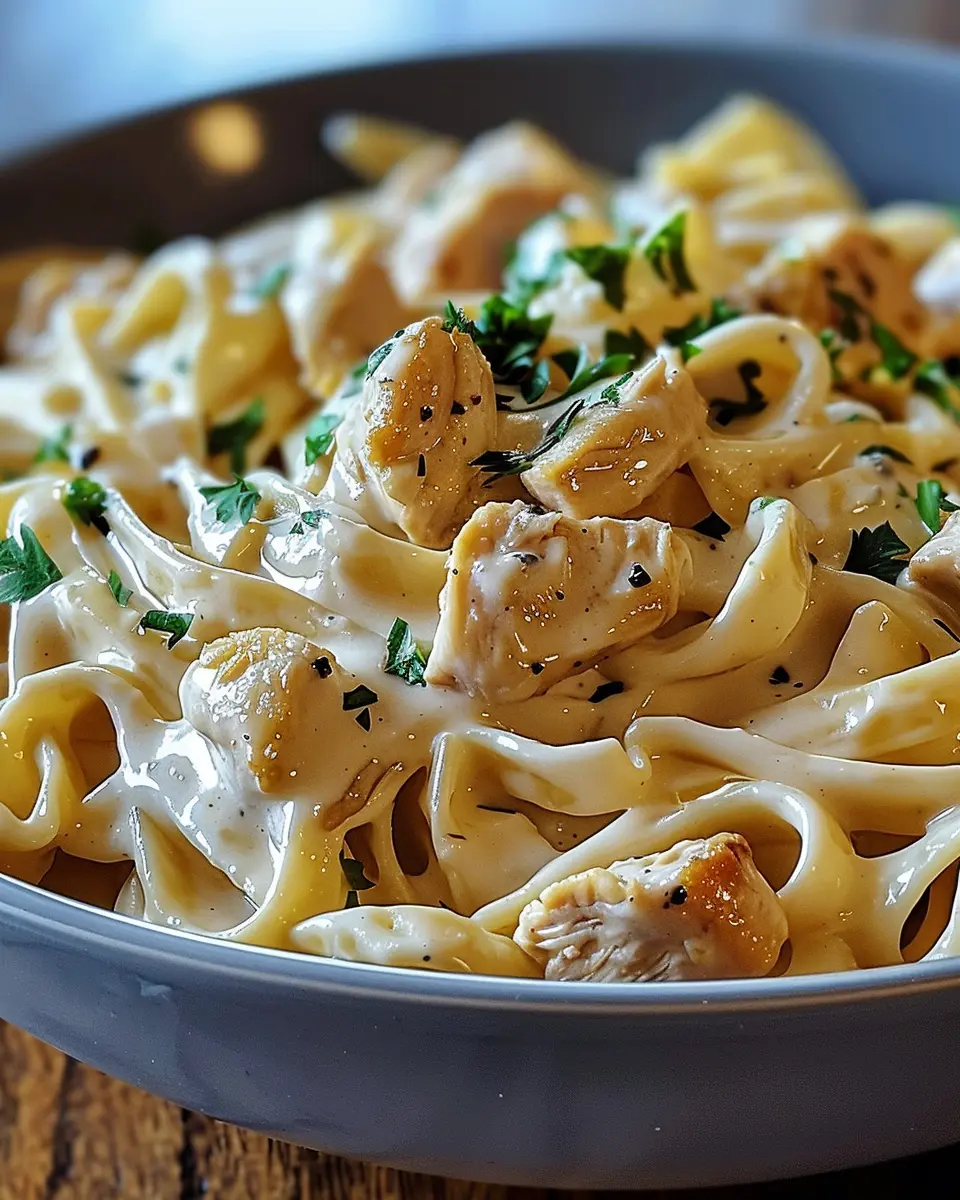
The satisfaction of kneading dough, watching it rise, and then slicing into a warm loaf is unparalleled. Whether slathered with butter, topped with your favorite spreads, or used to cradle tasty fillings like turkey bacon or chicken ham, each bite tells a story of care and craftsmanship.
The Benefits of Baking Your Own Bread
Deciding to make your own homemade bread comes with a treasure trove of benefits, both for your taste buds and your health. Here are some compelling reasons to roll up your sleeves and dive into bread-making:
-
Quality Ingredients: When you bake at home, you gain complete control over what goes into your bread. No preservatives, artificial flavors, or mystery ingredients—just wholesome goodness.
-
Cost-Effective: With the rising prices of store-bought bread, baking your own can be a smart financial choice. Flour, yeast, and water are inexpensive staples that yield a delicious return on investment.
-
Customization: Ever wished you could add your favorite herbs, spices, or seeds? When making homemade bread, you call the shots. Experiment with different flavors to create a loaf that’s perfect for your palate.
-
Healthier Choices: Homemade bread can be healthier than commercial options. Use whole grains, alternative flours, or even incorporate seeds and nuts for added nutrition—an excellent way to sneak more nutrients into your diet.
-
Therapeutic Benefits: The process of kneading dough is not only fun but also therapeutic. It’s a wonderful way to relieve stress. Plus, the anticipation of that first slice is a joy in itself!
If you’re intrigued by the idea of homemade bread, consider checking out resources like King Arthur Baking Company, which offer great tips and tricks for beginners. Ready to get started? Your kitchen adventure awaits!
Ingredients for Homemade Bread
When it comes to baking your own homemade bread, having the right ingredients makes all the difference. Let’s explore what you’ll need to create that delicious loaf everyone will love.
Essential Ingredients You Need
To craft the perfect homemade bread, make sure you have these basics on hand:
- Flour: All-purpose or bread flour are the most common choices. They provide the structure and hold the air – essential for that soft, chewy texture.
- Water: Warm water activates the yeast and helps bind the ingredients together. Temperature matters—aim for about 110°F.
- Yeast: Either active dry yeast or instant yeast will do. They’re your little leavening agents, making the loaf rise beautifully.
- Salt: This enhances flavor and regulates yeast activity. Just a teaspoon can go a long way!
- Sugar: A bit of sugar, whether granulated or brown, feeds the yeast, helping your bread achieve that lovely golden crust.
For more details on yeast types, consider checking out King Arthur Baking’s guide.
Optional Ingredients to Elevate Your Bread
Once you’ve got your essentials, think about adding some flair to your homemade bread:
- Fats: Adding butter or olive oil can make your bread richer and softer.
- Seeds or Nuts: Flaxseeds or walnuts are great options for added texture and nutrition.
- Herbs and Spices: Incorporating rosemary or garlic powder can infuse your loaf with beautiful flavors.
- Milk or Milk Alternatives: For a softer crumb and richer taste, try substituting some water with milk.
Experimenting with these optional ingredients can help you create a loaf that’s uniquely yours! Are you ready to start your bread-making journey?
Step-by-Step Preparation of Homemade Bread
Making homemade bread from scratch may seem intimidating at first, but with a little patience and the right techniques, you can create a warm loaf that fills your kitchen with a delightful aroma. Let’s explore the straightforward steps to prepare this cherished recipe, ensuring you’re set up for success!
Proofing the Yeast
The first step to baking a loaf of homemade bread is to bring your yeast to life. Use active dry yeast or instant yeast, both of which can yield fantastic results. Here’s how to do it:
- Warm water: Heat about 1 cup of water to around 100°F (just warm to the touch).
- Dissolve the yeast: In a mixing bowl, combine 2 teaspoons of yeast and 1 teaspoon of sugar with the warm water. Stir gently and let it sit for about 5-10 minutes, or until it becomes frothy.
Why do we do this? Proofing the yeast ensures it’s active and ready to make the dough rise. If it doesn’t froth, you may need to consider that your yeast might be expired — a common mishap when making homemade bread.
Mixing the Dough
Once your yeast is proofed, it’s time to create the dough mixture:
- In a large bowl, combine 3-4 cups of all-purpose flour and 1 teaspoon of salt.
- Make a well in the center and pour in your yeast mixture, followed by 2 tablespoons of olive oil (the kind of oil you love best should do).
- Mix using a wooden spoon or your hands until it all starts to come together.
At this stage, it’s perfectly normal for the dough to be a bit sticky. Resist the urge to add too much extra flour — trust the process!
Kneading for the Perfect Texture
Kneading is where the magic happens. It’s all about developing the gluten for that lovely chewy texture we adore:
- Flour your work surface lightly and turn out your dough.
- Knead the dough for about 8-10 minutes. Press down and fold it over itself, rotating it a quarter turn after each fold.
- Keep kneading until the dough is smooth and elastic. A quick test? Poke it with your finger; it should bounce back.
This is a satisfying step that you might find not only increases your dough’s texture but also is a wonderful mini workout!
First Rise – The Waiting Game
Once kneaded, your dough needs time to rise:
- Place the dough in a greased bowl, cover it with a damp cloth or plastic wrap, and leave it in a warm spot for about 1-2 hours — until it doubles in size.
This rising is crucial. It’s during this time that the yeast eats through the sugars, producing carbon dioxide and making the dough rise!
Shaping and Second Rise
After that first rise, it’s time to shape your loaf:
- Punch down the dough gently to release the air. Turn it onto a floured surface.
- Shape the dough into a loaf or your preferred shape, tucking the ends underneath.
- Place the shaped dough into a greased loaf pan and let it rise for another 30-60 minutes until it puffs up again.
This second rise contributes to the bread’s final texture and flavor. Feel free to use this time to preheat your oven to 375°F.
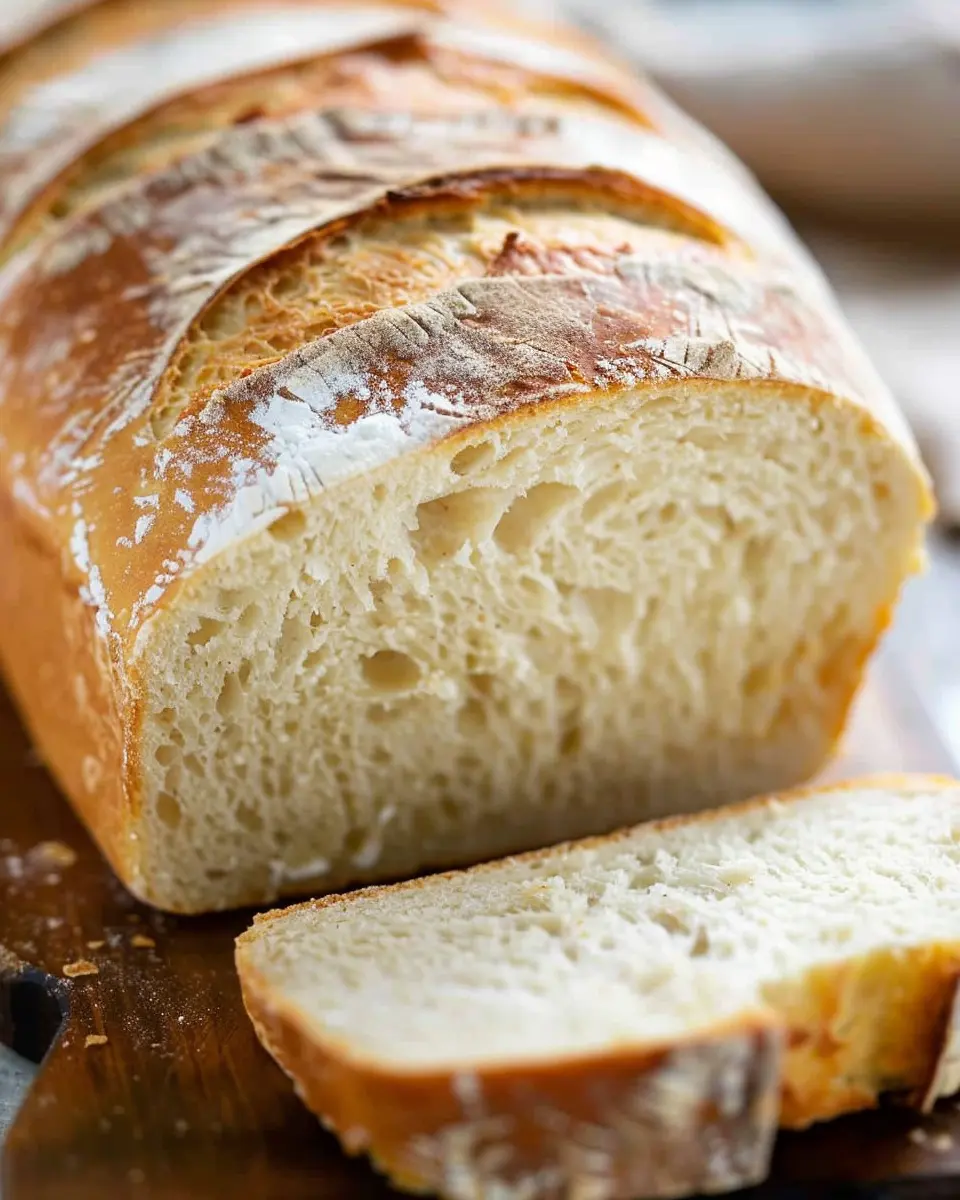
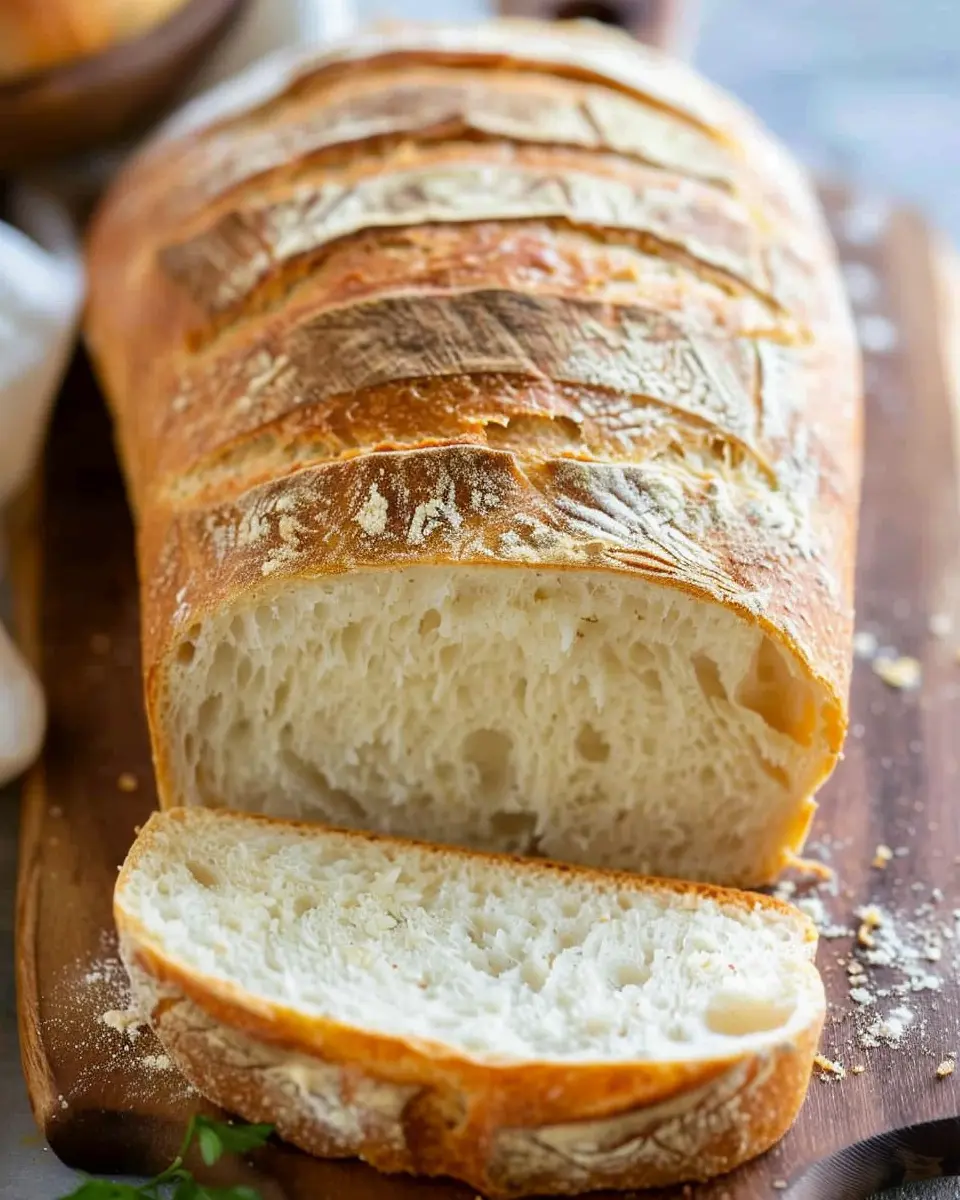
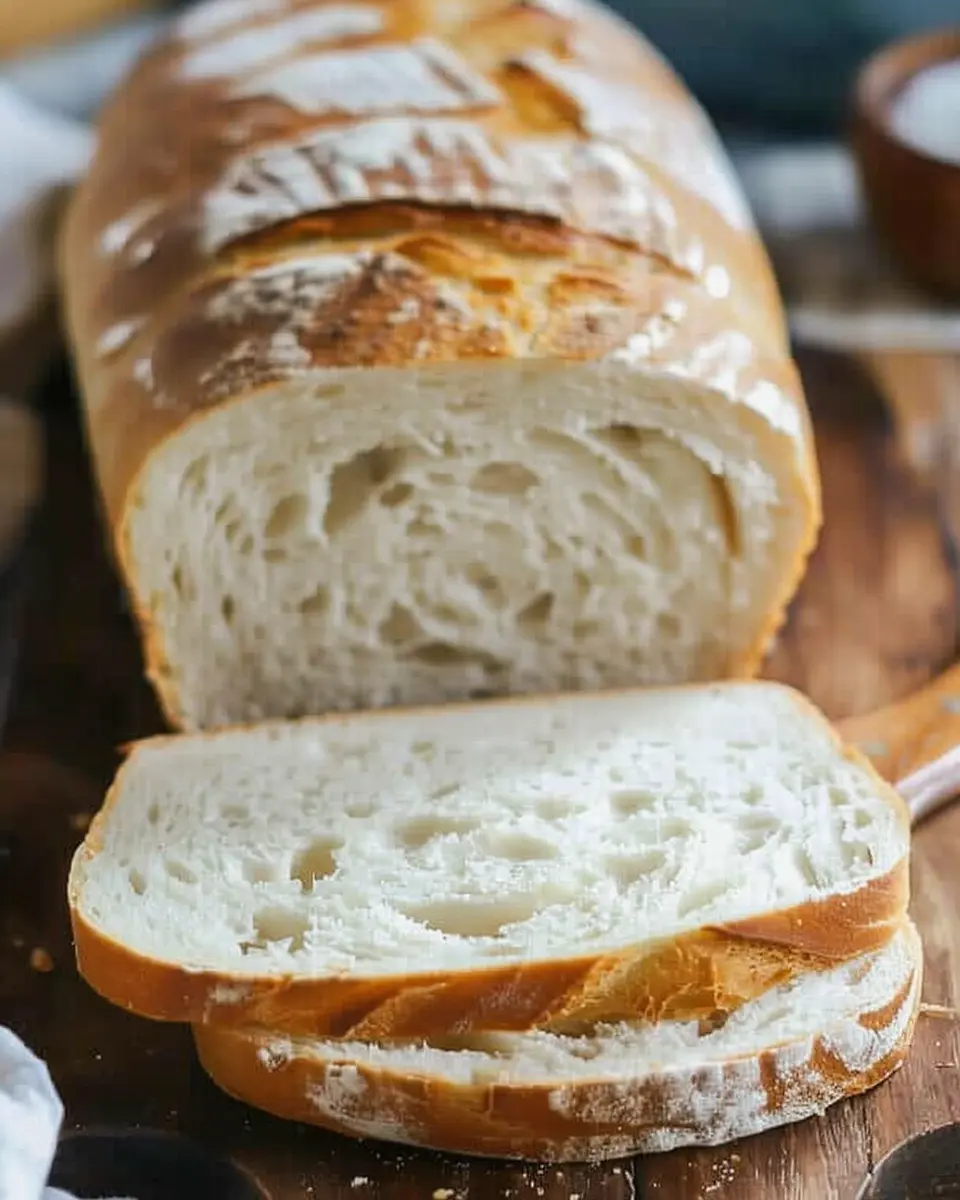
Baking to Golden Perfection
The final step is where patience pays off!
- Bake your homemade bread for about 30-35 minutes, or until it’s a beautiful golden brown and sounds hollow when tapped on the bottom.
- Allow it to cool on a wire rack for at least 15 minutes before slicing. The aroma will be irresistible, and the first slice is always a special moment.
With these steps, you’ll undoubtedly master the art of making homemade bread. Just think: The next time friends visit, you can impress them with your freshly baked loaf! For more tips on baking bread, consider checking out resources like King Arthur Baking for detailed guides and techniques. Enjoy your culinary adventure!
Variations on Homemade Bread
Whole Wheat Options for Health Enthusiasts
If you’re on the health-conscious side, incorporating whole wheat into your homemade bread is a fantastic option. Whole wheat flour retains the bran and germ of the wheat, offering more fiber and essential nutrients compared to white flour.
To make a delightful whole wheat loaf, simply substitute half or all of your all-purpose flour with whole wheat flour. You might want to add a tablespoon of vital wheat gluten to improve the bread’s texture. Other great additions could be:
- Oats: Add rolled oats for extra texture and fiber.
- Seeds: Flaxseed or chia seeds can boost omega-3 fatty acids.
- Honey or Maple Syrup: They can naturally sweeten your bread while adding delightful flavors.
For more ideas on the perks of whole grains, check out this resource from Whole Grains Council.
Flavored Breads: Adding Herbs and Spices
Why settle for plain when you can elevate your homemade bread with herbs and spices? Think outside the box and consider infusing your bread with bold flavors to complement your meals.
Here are few ideas to get you started:
- Herbs: Rosemary, thyme, or basil can transform your dough into something magical. Just mix in a tablespoon of dried herbs for aromatic goodness.
- Spices: Adding cinnamon or nutmeg gives a warm, inviting taste that’s perfect for breakfast breads. Alternatively, a pinch of red pepper flakes can provide a surprising kick.
- Cheese: Incorporating shredded cheese like cheddar or mozzarella creates a rich, savory treat.
Experimenting with these variations not only enhances the flavor but also keeps your baking experience exciting. Who knows, you might just discover your new favorite bread!
Making homemade bread doesn’t have to be mundane; it’s a delicious way to express your culinary creativity!
Cooking Tips and Notes for Homemade Bread
Common Mistakes to Avoid
When embarking on your journey to bake delicious homemade bread, it’s easy to trip up. Here are some common pitfalls:
- Skipping the kneading: Give those dough muscles a workout! Proper kneading develops gluten, giving the bread its structure and chew.
- Not measuring ingredients properly: Baking is a science. Invest in a kitchen scale for precision.
- Ignoring dough temperature: Aim for a warm, not hot, environment when proofing your bread. Yeast is a living organism that thrives in the right conditions.
For more insights, check out resources from King Arthur Baking.
How to Control the Rise and Texture
Achieving the perfect rise and texture in your homemade bread hinges on a few key techniques:
- Use fresh yeast: Always check the expiration date. Fresh yeast leads to better fermentation and rise.
- Water temperature matters: Use warm (but not scalding) water to activate your yeast. Around 110°F is ideal.
- Give it time: Patience is key. Allow your dough to rise adequately for a light, airy interior. A longer fermentation can deepen flavor too!
Remember, every oven is different, so keep an eye on your bread as it bakes!
Serving Suggestions for Homemade Bread
Perfect Pairings for Your Freshly Baked Bread
Freshly baked homemade bread creates an irresistible aroma that invites everyone to the table. To complement this delicious creation, consider pairing it with:
- Savory Dips: Whip up some hummus or pesto to spread over slices of your warm bread. The flavors meld beautifully.
- Cheese Selections: A cheese platter with sharp cheddar or creamy brie goes hand-in-hand with your loaf, transforming it into a gourmet experience.
- Turkey Bacon & Avocado: For a satisfying breakfast or lunch, layer crispy turkey bacon and creamy avocado on toasted slices.
Creative Uses Beyond Sandwiches
Think beyond traditional sandwiches when enjoying your homemade bread. Here are a few inventive uses:
- Bruschetta: Top toasted bread with diced tomatoes, basil, and a drizzle of olive oil for a fresh appetizer.
- Bread Pudding: Leftover slices can turn into a sweet or savory bread pudding. Simply soak in a custard mixture and bake to perfection.
- Garlic Bread: Mix butter, garlic, and herbs to spread on slices, then toast for a delightful side with pasta dishes.
Exploring these options not only enhances your meals but also showcases your culinary creativity. Enjoy every crumb!
Time Breakdown for Homemade Bread
When you’re diving into the world of homemade bread, understanding the timing is key to success. Here’s a quick breakdown to help you plan your baking adventure:
Preparation Time
The initial preparation takes about 15 minutes. You’ll mix your ingredients, knead the dough, and get everything ready for its first rise.
Rising Time
Patience is essential! Allow your dough to rise for about 1 to 2 hours, depending on your environment. A warm, draft-free area will help it double in size.
Baking Time
Once risen, baking takes around 25 to 30 minutes in a preheated oven. You’ll know it’s done when you hear a hollow sound when tapping on the crust.
Total Time
In total, you’re looking at approximately 2.5 to 3 hours from start to finish, including all rising and baking times. Enjoy the delightful journey of creating your own homemade bread! For tips on perfecting the art of bread baking, check out King Arthur Baking for expert insights.
Baking your own bread not only fills your home with warmth and delightful aromas but also allows for customization. What will you add to your loaf—herbs, seeds, or perhaps a hint of honey?
Nutritional Facts for Homemade Bread
Caloric Content per Slice
When it comes to homemade bread, each slice typically contains about 80 to 100 calories, depending on the ingredients and portion size. This can vary if you choose to add seeds, nuts, or other tasty extras. You might be surprised to learn that making your own bread isn’t just delicious; it’s also a great way to control your caloric intake!
Key Nutrients and Their Benefits
Homemade bread is rich in essential nutrients. Here’s a quick breakdown:
- Fiber: Whole grain flours provide dietary fiber, aiding digestion and promoting gut health.
- Protein: Vital for muscle repair, each slice contributes a good amount, especially if you include ingredients like wheat gluten.
- Vitamins and Minerals: B vitamins from whole grains contribute to energy metabolism, while minerals like iron are crucial for blood health.
For more in-depth information on the nutritional benefits of whole grains, you can check out resources like Harvard Health. By choosing to make your own bread, you not only enjoy fresh flavors but also ensure you’re getting wholesome goodness with every bite!
FAQs about Homemade Bread
How can I tell if my bread has risen enough?
One of the joys of making homemade bread is watching it come to life as it rises. But how do you know when it’s ready? A good rule of thumb is to look for about double the original size. You can also perform the “poke test”: gently poke the dough with your finger. If the indentation springs back slowly, it’s perfect! If it springs back quickly, it might need more time. Remember, patience is key — cozy up with a good book while you wait!
Can I use different types of flour?
Absolutely! Experimenting with homemade bread using various flours can lead to delightful results. Whole wheat flour adds nuttiness and nutrition, while bread flour yields a chewier texture due to its higher protein content. Keep in mind that if you swap out all-purpose flour for a heavier option, you may need to adjust the hydration levels in your recipe. Check out this resource on flour types for bread from the King Arthur Baking Company.
What’s the best way to store homemade bread?
To keep your homemade bread fresh, wrap it in a clean kitchen towel or place it in a paper bag at room temperature. If you’re not going to finish it within a few days, consider slicing it and freezing portions in an airtight bag. This way, you can enjoy your delicious bread whenever the craving strikes! Just pop it in the toaster or let it thaw at room temperature. Storing properly not only maintains the flavor but also enhances your homemade experience.
Conclusion on Homemade Bread
The Joy of Baking and Its Rewards
There’s something truly magical about the process of making homemade bread. The warm, yeasty aroma wafting through your kitchen can transform any ordinary day into an extra special occasion. Baking offers a sense of achievement that few other activities can match. Whether you’re indulging in a slice topped with creamy avocado or using it as the foundation for a delicious Turkey Bacon sandwich, each bite is a reward for your efforts.
As you embark on your baking journey, remember that practice makes perfect. Explore different flavors and techniques, and don’t be afraid to experiment! Who knows? You might just create a new family favorite. For more tips and tricks, check out King Arthur Baking or The Perfect Loaf to enhance your homemade bread adventures!
PrintHomemade Bread: The Best Indulgent Recipe for Comfort Food
Learn to make the best homemade bread, a recipe that embodies comfort food.
- Prep Time: 15 minutes
- Cook Time: 35 minutes
- Total Time: 1 hour 50 minutes
- Yield: 1 loaf 1x
- Category: Bread
- Method: Baking
- Cuisine: American
- Diet: Vegetarian
Ingredients
- 3 cups all-purpose flour
- 1 packet instant yeast
- 1 teaspoon salt
- 1 tablespoon sugar
- 1 cup warm water
- 2 tablespoons olive oil
Instructions
- In a bowl, mix warm water, sugar, and yeast. Let it sit for 5 minutes until foamy.
- Add olive oil, salt, and flour to the yeast mixture.
- Knead the dough for about 10 minutes until smooth.
- Let it rise in a greased bowl for 1 hour or until doubled in size.
- Shape the dough and place it in a loaf pan.
- Let it rise again for 30 minutes.
- Bake at 375°F (190°C) for 30-35 minutes, or until golden brown.
- Let cool before slicing.
Notes
- For a crispy crust, place a pan of water in the oven while baking.
- You can add herbs or garlic for extra flavor.
Nutrition
- Serving Size: 1 slice
- Calories: 120
- Sugar: 1g
- Sodium: 200mg
- Fat: 3g
- Saturated Fat: 0.5g
- Unsaturated Fat: 2g
- Trans Fat: 0g
- Carbohydrates: 22g
- Fiber: 1g
- Protein: 4g
- Cholesterol: 0mg
Keywords: homemade bread, comfort food, baking, bread recipe